一、模拟场景
创建业务函数如下:
CREATE OR REPLACE PROCEDURE public.my_proc()
 LANGUAGE plpgsql
AS $$
DECLARE
BEGIN
    raise notice 'step1 start at %',clock_timestamp();
    execute 'select 1 ; select pg_sleep(1); ';

    raise notice 'step2 start at %',clock_timestamp();
    execute 'select 2 ;select pg_sleep(2); ';

    raise notice 'step3 start at %',clock_timestamp();
    execute 'select 3 ;select pg_sleep(3); ';
end;
$$;
函数主要三个执行步骤,使用pg_sleep函数每个执行步骤分别延时1s、2s、3s。
二、数据库服务器安装plprofiler扩展
https://github.com/bigsql/plprofiler
plprofiler编译安装如下:
tar zxvf plprofiler-REL4_1.tar.gz
cd plprofiler-REL4_1
make USE_PGXS=1
make USE_PGXS=1 install
然后连接数据库,安装扩展
$ psql
psql (12.7)
Type "help" for help.
postgres=# create extension plprofiler with schema public;
CREATE EXTENSION
postgres=# \dx plprofiler
                             List of installed extensions
    Name    | Version | Schema |                     Description
------------+---------+--------+------------------------------------------------------
 plprofiler | 4.1     | public | server-side support for profiling PL/pgSQL functions
(1 row)
三、客户端安装plprofiler工具
plprofiler客户端工具安装依赖python,需要注意python与python3,不能互相干扰。 本文在centos7.6下通过rpm检查是否有python3相关的包,如果有则移除。
yum安装相关依赖包
yum install python-devel
yum install python-setuptools
yum install python-pip
注意安装完python-pip后,不要升级pip。
yum安装python-configparser
yum install python-configparser
源码安装psycopg2-binary,注意版本是2.8.6,与python版本有关
https://pypi.org/project/psycopg2-binary/2.8.6/#files
tar zxvf psycopg2-binary-2.8.6.tar.gzz
cd psycopg2-binary-2.8.6
python setup.py install
参考数据库服务端下载的plprofiler压缩包,进入python-plprofiler
cd plprofiler-REL4_1/python-plprofiler
sudo python ./setup.py install
至此客户端工具plprofiler安装完成。
四、运行plprofiler调用函数,并生成HTML报告
plprofiler run --host=192.168.137.11 --port=5432 --user=postgres --dbname=postgres \
--command="select my_fun();" \
--output=my_fun.html
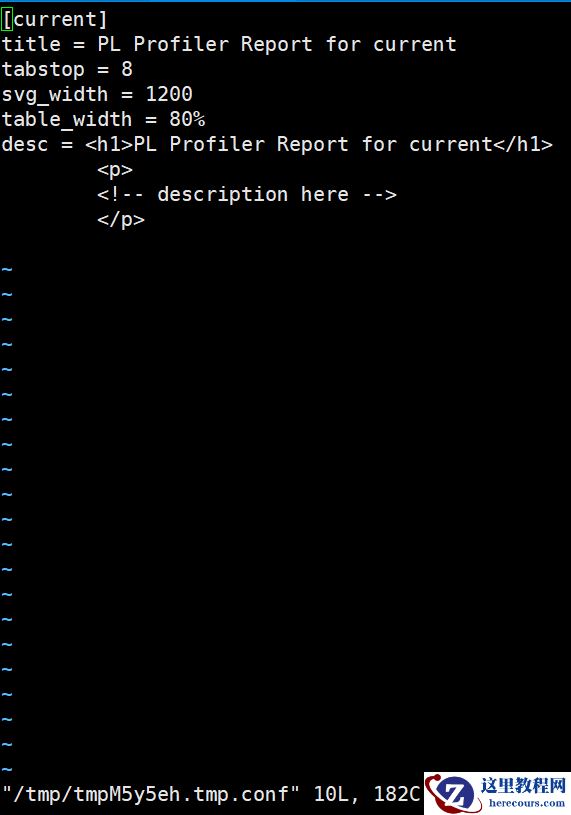
执行完后会出现如下HTML模板,可修改title等信息,也可以直接输入冒号,退出vi编辑模式。
五、查看HTML报告
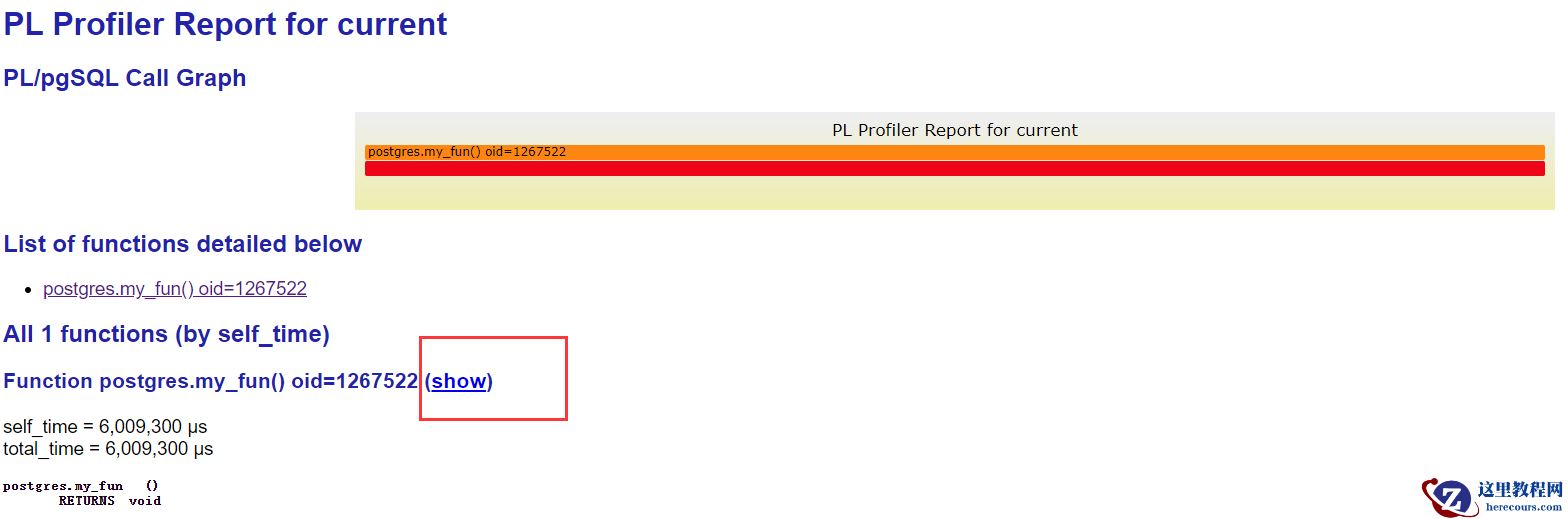
点击“show”可以展开查看详细
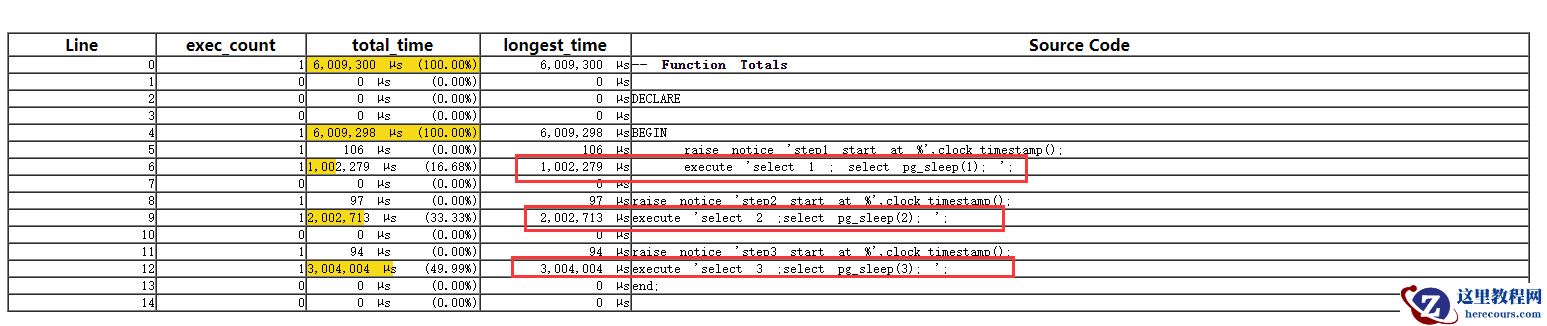 如图可以看出函数中每个步骤执行的情况。
保持联系
本人组建了一个技术交流群:PG乐知乐享交流群。欢迎关注文章的小伙伴随缘加入,进群请加本人微信skypkmoon并备注PG乐知乐享。


")


