MySql 8.0及对应驱动包匹配注意点
MySql 数据库更新为8.0及以上后,对应的应用程序数据库链接驱动包也要更新为8.0版本。否则会报驱动异常。
需要注意以下几点:
1.最新驱动包Maven下载配置如下:
<dependency> <groupId>mysql</groupId> <artifactId>mysql-connector-java</artifactId> <version>8.0.11</version> </dependency> <dependency> <groupId>org.apache.commons</groupId> <artifactId>commons-pool2</artifactId> <version>${common.pool.version}</version> </dependency>
2.JDBC配置表更新如下:
以前版本
jdbc.driver=com.mysql.jdbc.Driver jdbc.url=jdbc:mysql://xxx.xx.xx.xxx:3306/db?characterEncoding=utf-8 jdbc.username=root jdbc.password=admin
现在版本
jdbc.driver=com.mysql.cj.jdbc.Driver jdbc.url=jdbc:mysql://xxx.xx.xx.xxx:3306/db?useUnicode=true&characterEncoding=utf-8&useSSL=false&serverTimezone=GMT%2B8 jdbc.username=root jdbc.password=admin ---------全局如下配置 spring.datasource.url = jdbc:mysql://127.0.0.1:3306/cim?useUnicode=true&characterEncoding=utf8&serverTimezone=UTC spring.datasource.username = cim spring.datasource.password = f8HYPmssXL6XmZeK spring.datasource.type=com.zaxxer.hikari.HikariDataSource spring.datasource.driver-class-name = com.mysql.cj.jdbc.Driver spring.datasource.hikari.minimum-idle=5 spring.datasource.hikari.maximum-pool-size=10 spring.datasource.hikari.auto-commit=true spring.datasource.hikari.idle-timeout=30000 spring.datasource.hikari.pool-name=MASTER_HIKARI_POOL spring.datasource.hikari.max-lifetime=120000 spring.datasource.hikari.connection-timeout=30000 spring.datasource.hikari.connection-test-query=SELECT 1 spring.datasource.hikari.validation-timeout=600000
使用jdbcTemplate
①、依赖
<dependency> <groupId>mysql</groupId> <artifactId>mysql-connector-java</artifactId> </dependency> <dependency> <groupId>org.springframework.boot</groupId> <artifactId>spring-boot-starter-jdbc</artifactId> </dependency>
maven编译项目时报错,信息如下:

解决方式一:在pom.xml文件增加如下配置信息
<plugin> <groupId>org.apache.maven.plugins</groupId> <artifactId>maven-surefire-plugin</artifactId> <configuration> <skip>true</skip> </configuration> </plugin>
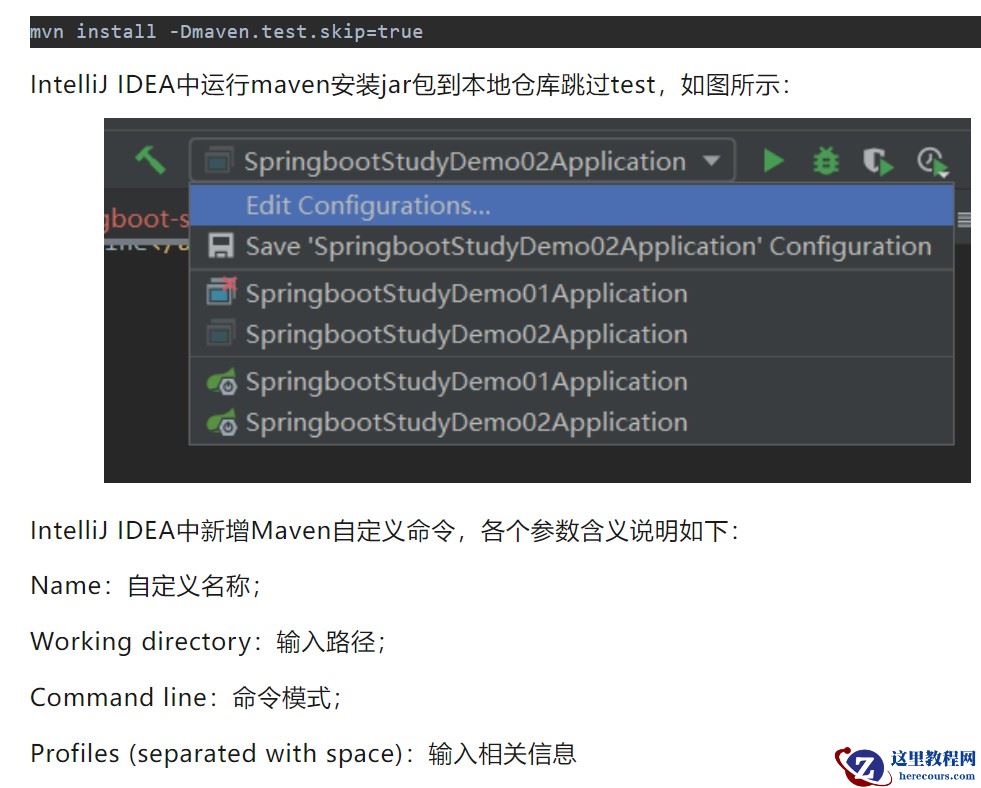
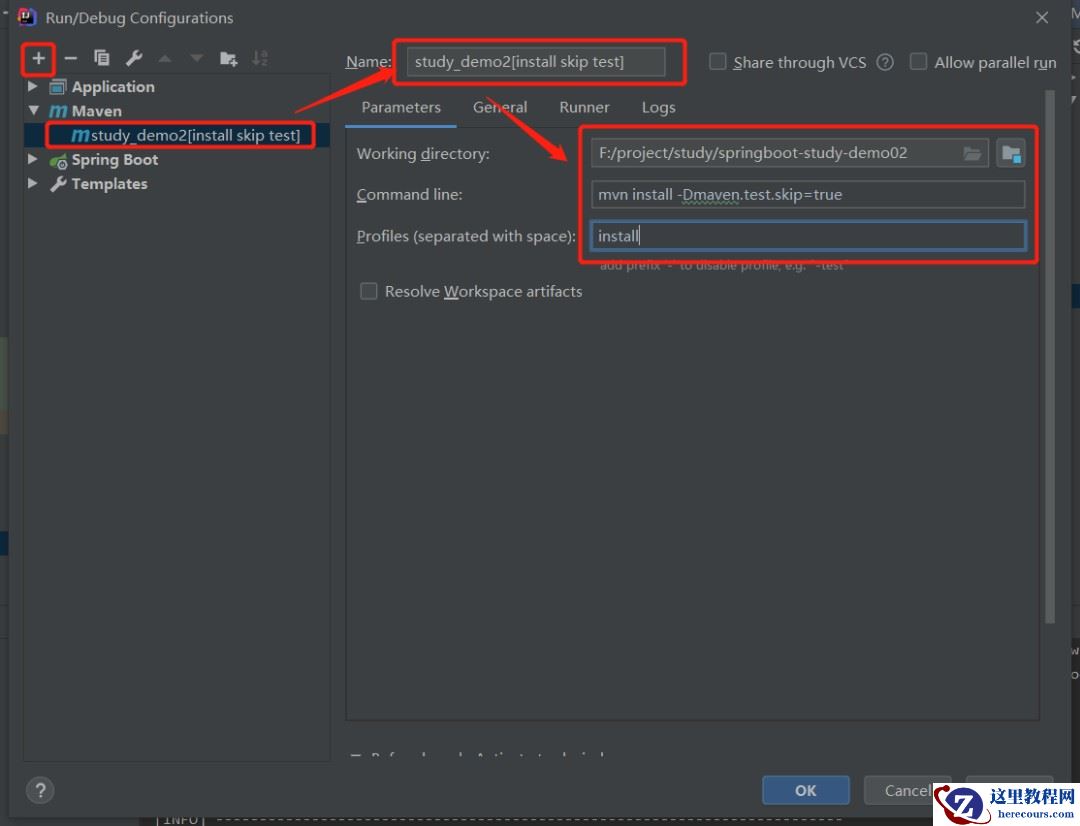
解决方式二:使用命令参数,如下所示:
②、在resource文件夹下application.properties配置文件中增加数据库参数
spring.datasource.url=jdbc:mysql://127.0.0.1:3306/dba spring.datasource.username=root spring.datasource.password=123456 spring.datasource.driver-class-name=com.mysql.cj.jdbc.Driver spring.datasource.max-idle=10 spring.datasource.max-wait=1000 spring.datasource.min-idle=5 spring.datasource.initial-size=5
③、测试
@RestController @RequestMapping("/jte") public class JdbcTemplateController { @Autowired private JdbcTemplate jdbcTemplate; @RequestMapping("/getUsers") public List<Map<String, Object>> getDbType(){ String sql = "select * from boot_user"; List<Map<String, Object>> list = jdbcTemplate.queryForList(sql); for (Map<String, Object> map : list) { Set<Entry<String, Object>> entries = map.entrySet( ); if(entries != null) { Iterator<Entry<String, Object>> iterator = entries.iterator( ); while(iterator.hasNext( )) { Entry<String, Object> entry =(Entry<String, Object>) iterator.next( ); Object key = entry.getKey( ); Object value = entry.getValue(); System.out.println(key+":"+value); } } } return list; } }
启动Maven项目,输入地址:
http://localhost:8080/jte/getUsers
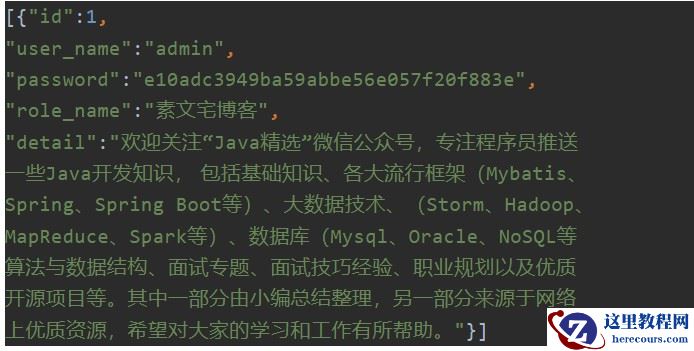
通过浏览器访问后,返回参数如下:
集成Mybatis
①、添加依赖
<dependency> <groupId>org.mybatis.spring.boot</groupId> <artifactId>mybatis-spring-boot-starter</artifactId> <version>1.0.0</version> </dependency>
②、在resource文件夹下application.properties配置文件中增加数据库参数
spring.datasource.url=jdbc:mysql://127.0.0.1:3306/dba spring.datasource.username=root spring.datasource.password=123456 spring.datasource.driver-class-name=com.mysql.cj.jdbc.Driver spring.datasource.max-idle=10 spring.datasource.max-wait=1000 spring.datasource.min-idle=5 spring.datasource.initial-size=5
③、mapper接口类和xml文件
public interface BootUserMapper { List<BootUser> selectAll(); }
<?xml version="1.0" encoding="UTF-8" ?> <!DOCTYPE mapper PUBLIC "-//mybatis.org//DTD Mapper 3.0//EN" "http://mybatis.org/dtd/mybatis-3-mapper.dtd" > <mapper namespace="com.yoodb.study.demo02.mapper.BootUserMapper" > <resultMap id="BaseResultMap" type="com.yoodb.study.demo02.bean.BootUser" > <id column="id" property="id" jdbcType="VARCHAR" /> <result column="user_name" property="name" jdbcType="VARCHAR" /> <result column="detail" property="detail" jdbcType="VARCHAR" /> </resultMap> <select id="selectAll" resultMap="BaseResultMap"> select id, user_name, detail from boot_user order by detail asc </select> </mapper>
public class BootUser { private String id; private String name; private String detail; public String getId() { return id; } public void setId(String id) { this.id = id; } public String getName() { return name; } public void setName(String name) { this.name = name; } public String getDetail() { return detail; } public void setDetail(String detail) { this.detail = detail; } }
④业务类
@Service public class BootUserService { @Autowired private BootUserMapper mapper; public List<BootUser> getUsers(){ return mapper.selectAll(); } }
@RestController @RequestMapping("/myt") public class BootUserController { @Autowired private BootUserService service; @RequestMapping("/getUsers") public List<BootUser> getUsers() { List<BootUser> list = service.getUsers(); return list; } }
启动Maven项目,通过浏览器访问http://localhost:8080/myt/getUsers
解决方案:
<resources> <resource> <directory>src/main/java</directory> <includes> <include>**/*.xml</include> </includes> </resource> </resources>
重新启动Maven项目,输入地址:
http://localhost:8080/myt/getUsers
多数据源配置
一、Spring Boot集成MyBatis和使用JdbcTemplate配置公共文件
有两个数据源来配置实现,分别对应的名字是oneDataSource和twoDataSource
在application.properties文件中配置数据源信息如下:
spring.datasource.one.url=jdbc:mysql://123.57.47.154:3306/springboot1 spring.datasource.one.username=root spring.datasource.one.password=wangyoodb spring.datasource.one.driverClassName=com.mysql.cj.jdbc.Driver spring.datasource.two.url=jdbc:mysql://123.57.47.154:3306/springboot2 spring.datasource.two.username=root spring.datasource.two.password=wangyoodb spring.datasource.two.driverClassName=com.mysql.cj.jdbc.Driver
二、配置类进行加载DataSource
@Configuration:用于定义配置类,可替换xml配置文件,被注解的类内部包含有一个或多个被@Bean注解的方法。这些方法将会被AnnotationConfigApplicationContext或AnnotationConfigWebApplicationContext类进行扫描,并用于构建bean定义,初始化Spring容器@MapperScan:指定要扫描mapper类包的路径,配置mybatis的接口存放位置@Bean:用于告诉方法产生一个Bean对象,然后这个Bean对象交给Spring管理@ConfigurationProperties:是Spring Boot提供的类型安全的属性绑定,以第一个Bean为例。@ConfigurationProperties(prefix = “spring.datasource.one”)表示使用spring.datasource.one前缀的数据库配置去创建一个DataSource@Primary:可以理解为默认优先选择,不可以同时设置多个,必须增加此注解用于区分主数据库(默认数据库)。@Qualifier:来达到注入某个特指bean的作用,表示查找Spring容器中指定名字的对象【bean.setMapperLocations(new PathMatchingResourcePatternResolver().getResources(“***”)) mapper的xml形式文件位置必须要配置,不然项目会报no statement错误信息。】
@Configuration @MapperScan(basePackages = "com.yoodb.study.demo03.mapper.one", sqlSessionFactoryRef = "oneSqlSessionFactory") public class DataSourceOneConfig{ @Bean(name = "oneDataSource") @Primary @ConfigurationProperties(prefic = "spring.datasource.one") public DataSource getDateSourceOne(){ return DataSourceBuilder.create().build(); } @Bean(name="oneSqlSessionFactory") @Primary public SqlSessionFactory oneSqlSessionFactory(@Qualifier("oneDataSource") DataSource datasource) throws Exception{ SqlSessionFactoryBean bean = new SqlSessionFactoryBean(); bean.setDataSource(datasource); bean.setMapperLocations(new PathMatchingResourcePatternResolver().getResources("classpath*:mapper/one/*.xml")); return bean.getObject(); } @Bean("oneSqlSessionTemplate") @Primary public SqlSessionTemplate onesqlsessiontemplate(@Qualifier("oneSqlSessionFactory") SqlSessionFactory sessionfactory){ return new SqlSessionTemplate(sessionfactory); } }
@Configuration @MapperScan(basePackages = "com.yoodb.study.demo03.mapper.two", sqlSessionFactoryRef = "twoSqlSessionFactory") public class DataSourceTwoConfig { @Bean(name = "twoDataSource") @ConfigurationProperties(prefix = "spring.datasource.two") public DataSource getDateSourceTwo(DataSourceProperties properties) { return DataSourceBuilder.create(properties.getClassLoader()) .type(HikariDataSource.class) .driverClassName(properties.determineDriverClassName()) .url(properties.determineUrl()) .username(properties.determineUsername()) .password(properties.determinePassword()) .build(); } @Bean(name = "twoSqlSessionFactory") public SqlSessionFactory twoSqlSessionFactory(@Qualifier("twoDataSource") DataSource datasource) throws Exception { SqlSessionFactoryBean bean = new SqlSessionFactoryBean(); bean.setDataSource(datasource); bean.setMapperLocations( new PathMatchingResourcePatternResolver().getResources("classpath*:mapper/two/*.xml")); return bean.getObject(); } @Bean("twoSqlSessionTemplate") public SqlSessionTemplate twosqlsessiontemplate( @Qualifier("twoSqlSessionFactory") SqlSessionFactory sessionfactory) { return new SqlSessionTemplate(sessionfactory); } }
三、实体类
两个数据源公用一个实体类
public class BootUser { private String id; private String name; private String detail; public String getId() { return id; } public void setId(String id) { this.id = id; } public String getName() { return name; } public void setName(String name) { this.name = name; } public String getDetail() { return detail; } public void setDetail(String detail) { this.detail = detail; } }
四、新增mapper.xml文件
数据源一:在src/main/resources/mapper/one(不存在文件加新建)创建BootUserOneMapper.xml文件,具体配置信息如下:
<?xml version="1.0" encoding="UTF-8" ?> <!DOCTYPE mapper PUBLIC "-//mybatis.org//DTD Mapper 3.0//EN" "http://mybatis.org/dtd/mybatis-3-mapper.dtd" > <mapper namespace="com.yoodb.study.demo03.mapper.one.BootUserOneMapper" > <resultMap id="BaseResultMap" type="com.yoodb.study.demo03.bean.BootUser" > <id column="id" property="id" jdbcType="VARCHAR" /> <result column="user_name" property="name" jdbcType="VARCHAR" /> <result column="detail" property="detail" jdbcType="VARCHAR" /> </resultMap> <select id="selectAll" resultMap="BaseResultMap"> select id, user_name, detail from boot_user order by detail asc </select> </mapper>
数据源二:在src/main/resources/mapper/two(不存在文件加新建)创建BootUserTwoMapper.xml文件,具体配置信息如下:
<?xml version="1.0" encoding="UTF-8" ?> <!DOCTYPE mapper PUBLIC "-//mybatis.org//DTD Mapper 3.0//EN" "http://mybatis.org/dtd/mybatis-3-mapper.dtd" > <mapper namespace="com.yoodb.study.demo03.mapper.two.BootUserTwoMapper" > <resultMap id="BaseResultMap" type="com.yoodb.study.demo03.bean.BootUser" > <id column="id" property="id" jdbcType="VARCHAR" /> <result column="user_name" property="name" jdbcType="VARCHAR" /> <result column="detail" property="detail" jdbcType="VARCHAR" /> </resultMap> <select id="selectAll" resultMap="BaseResultMap"> select id, user_name, detail from boot_user order by detail asc </select> </mapper>
五、新增接口文件
数据源一:mapper接口类文件,具体代码如下:
public interface BootUserOneMapper { List<BootUser> selectAll(); }
数据源二:mapper接口类文件,具体代码如下:
public interface BootUserTwoMapper { List<BootUser> selectAll(); }
六、创建service/controller
@Service public class BootUserService { @Autowired private BootUserOneMapper onemapper; @Autowired private BootUserTwoMapper twomapper; public List<BootUser> getUsers(){ List<BootUser> listone = onemapper.selectAll(); List<BootUser> listtwo = twomapper.selectAll(); listone.addAll(listtwo); return listone; } }
@RestController @RequestMapping("/myt") public class BootUserController { @Autowired private BootUserService service; @RequestMapping("/getUsers") public List<BootUser> getUsers() { List<BootUser> list = service.getUsers(); return list; } }
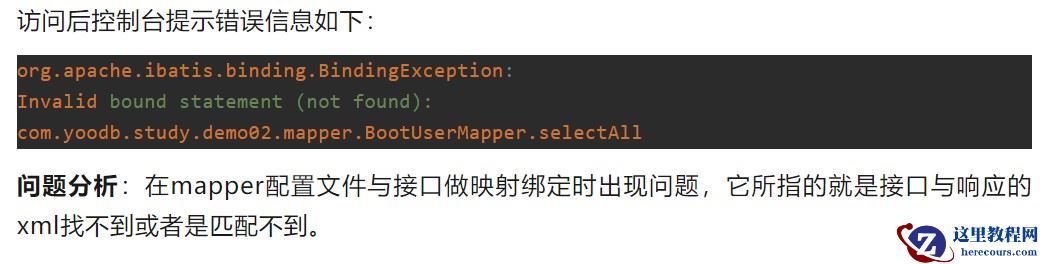
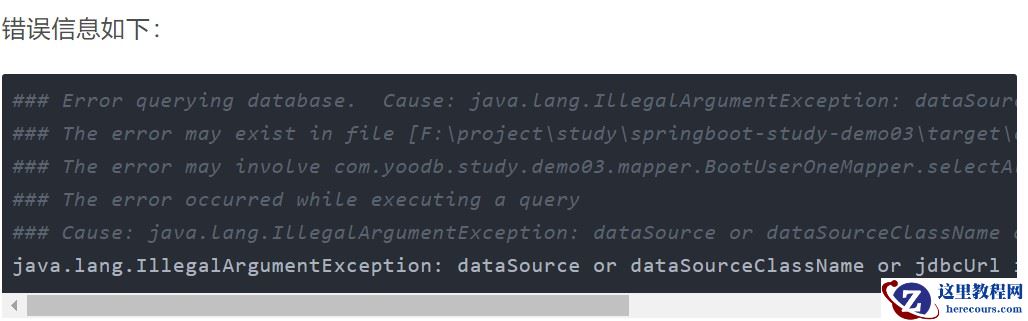
项目启动过程中控制台报错,错误信息如下:

解决方法:就是在pom.xml文件中增加如下配置信息:
<resources> <resource> <!-- 指定resources插件处理哪个目录下的资源文件 --> <directory>src/main/resources</directory> <includes> <include>**/**</include> </includes> </resource> </resources>
http://localhost:8080/myt/getUsers
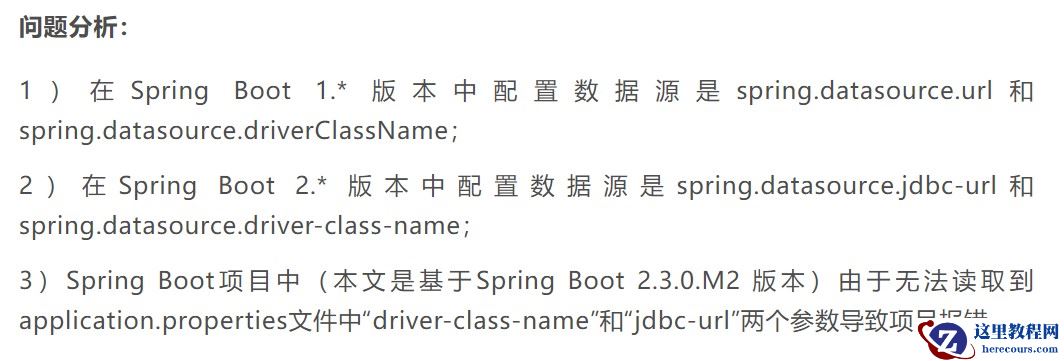
解决方案
将application.properties文件中spring.datasource…url和spring.datasource…driverClassName分别替换成spring.datasource…jdbc-url和spring.datasource…driver-class-name。
Spring Boot源码分析:
1)spring.datasource..url替换成spring.datasource..jdbcUrl也没有任何问题。
源码org.springframework.boot.jdbc包中DatabaseDriver.class文件反编译后,发现url参数必须以“jdbc”开始,具体源码如下:
public static DatabaseDriver fromJdbcUrl(String url) { if (StringUtils.hasLength(url)) { Assert.isTrue(url.startsWith("jdbc"), "URL must start with 'jdbc'"); String urlWithoutPrefix = url.substring("jdbc".length()).toLowerCase(Locale.ENGLISH); DatabaseDriver[] var2 = values(); int var3 = var2.length; for(int var4 = 0; var4 < var3; ++var4) { DatabaseDriver driver = var2[var4]; Iterator var6 = driver.getUrlPrefixes().iterator(); while(var6.hasNext()) { String urlPrefix = (String)var6.next(); String prefix = ":" + urlPrefix + ":"; if (driver != UNKNOWN && urlWithoutPrefix.startsWith(prefix)) { return driver; } } } } return UNKNOWN; }
2)spring.datasource.*.driverClassName不替换也没有影响。
源码org.springframework.boot.autoconfigure.jdbc包中ConfigurationProperties.class文件反编译后,发现属性即为driverClassName字段,具体源码如下:
public String determineDriverClassName() { if (StringUtils.hasText(this.driverClassName)) { Assert.state(this.driverClassIsLoadable(), () -> { return "Cannot load driver class: " + this.driverClassName; }); return this.driverClassName; } else { ...
修改application.properties文件配置,参考信息如下:
spring.datasource.one.jdbc-url=jdbc:mysql://123.57.47.154:3306/springboot1 spring.datasource.one.username=root spring.datasource.one.password=wangyoodb spring.datasource.one.driver-class-name=com.mysql.cj.jdbc.Driver spring.datasource.two.jdbc-url=jdbc:mysql://123.57.47.154:3306/springboot2 spring.datasource.two.username=root spring.datasource.two.password=wangyoodb spring.datasource.two.driver-class-name=com.mysql.cj.jdbc.Driver
使用JdbcTemplate
@RestController @RequestMapping("/jte") public class JdbcTemplateController { @Autowired private JdbcTemplate oneSqlSessionTemplate; @Autowired private JdbcTemplate twoSqlSessionTemplate; @RequestMapping("/getOneUsers") public List<Map<String, Object>> getOneUsers(){ String sql = "select * from boot_user"; List<Map<String, Object>> list = twoSqlSessionTemplate.queryForList(sql); for (Map<String, Object> map : list) { Set<Entry<String, Object>> entries = map.entrySet( ); if(entries != null) { Iterator<Entry<String, Object>> iterator = entries.iterator( ); while(iterator.hasNext( )) { Entry<String, Object> entry =(Entry<String, Object>) iterator.next( ); Object key = entry.getKey( ); Object value = entry.getValue(); System.out.println(key+":"+value); } } } return list; } @RequestMapping("/getTwoUsers") public List<BootUser> getTwoUsers() { List<BootUser> list = twoSqlSessionTemplate.query("select id,user_name " + "name,detail from boot_user", new BeanPropertyRowMapper<>(BootUser.class)); return list; } }
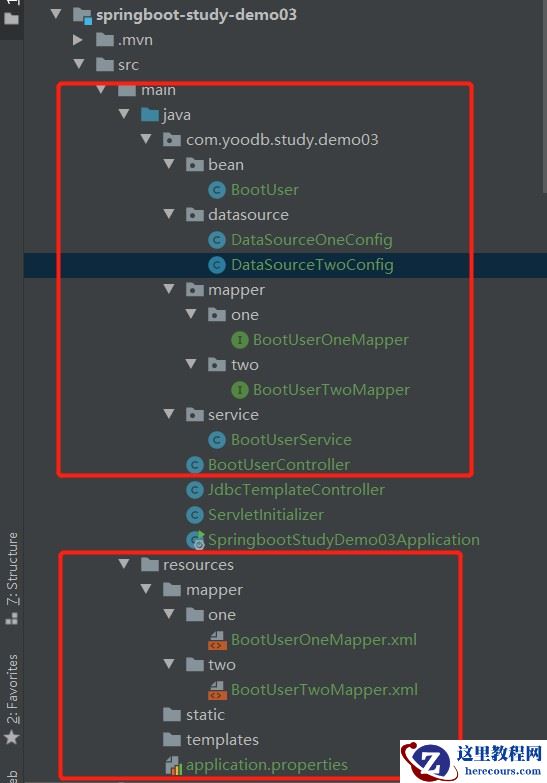
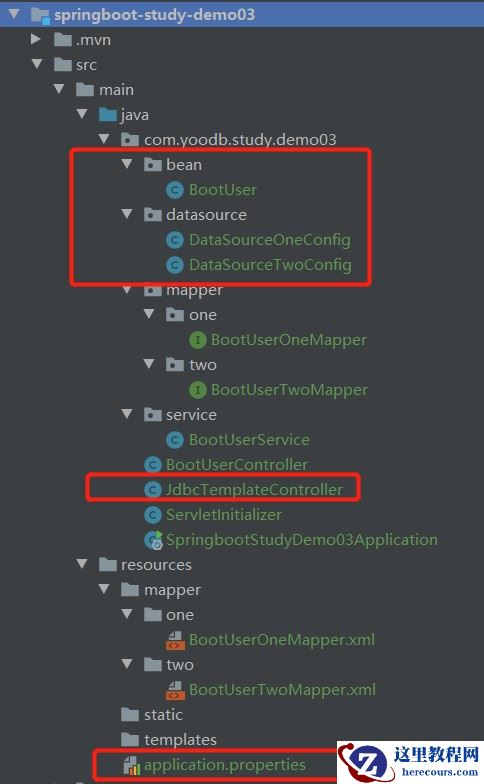
多数据源配置文件、多数据源类文件、实体类文件、controller层创建完成后,目录如图:
项目启动后访问多数据源一请求地址:
http://localhost:8080/jte/getOneUsers
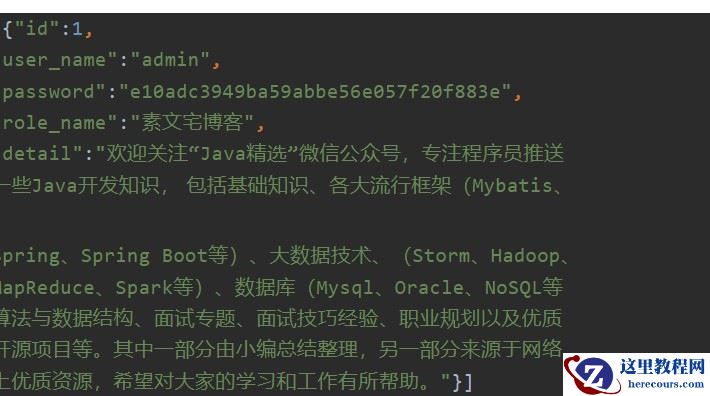
通过浏览器访问输出如下信息:
[{"id":1,"user_name":"素文宅博客","password":"e10adc3949ba59abbe56e057f20f883e","role_name":"素文宅博客","detail":"欢迎关注“Java精选”微信公众号,专注程序员推送一些Java开发知识,包括基础知识、各大流行框架(Mybatis、Spring、Spring Boot等)、大数据技术(Storm、Hadoop、MapReduce、Spark等)、数据库(Mysql、Oracle、NoSQL等)、算法与数据结构、面试专题、面试技巧经验、职业规划以及优质开源项目等。"}]
项目启动后访问多数据源二请求地址:
http://localhost:8080/jte/getTwoUsers
通过浏览器访问输出如下信息:
[{"id":"1","name":"素文宅博客","detail":"欢迎关注“Java精选”微信公众号,专注程序员推送一些Java开发知识,包括基础知识、各大流行框架(Mybatis、Spring、Spring Boot等)、大数据技术(Storm、Hadoop、MapReduce、Spark等)、数据库(Mysql、Oracle、NoSQL等)、算法与数据结构、面试专题、面试技巧经验、职业规划以及优质开源项目等。"}]
Spring容器中JdbcTemplate提供了两种注入方式,一种是使用@Resource注解,直接通过byName的方式注入进来,另外一种就是@Autowired注解加上@Qualifier注解,两者联合起来,实际上也是byName。
将JdbcTemplate注入成功后,oneSqlSessionTemplate和twoSqlSessionTemplate此时就代表操作不同的数据源,使用不同的JdbcTemplate操作不同的数据源,实现了多数据源配置。
总结
以上为个人经验,希望能给大家一个参考,也希望大家多多支持。


 3D NAND 闪存量产")

 3D NAND 闪存量产")


