一.安装centos系统(此处以centos7.9为例)略 二.配置本地yum源 http://blog.itpub.net/70004783/viewspace-2789438/ 三、 数据库安装准备工作
|
Hostname |
dbserver |
|
版本 |
oracle11.2.0.4 |
|
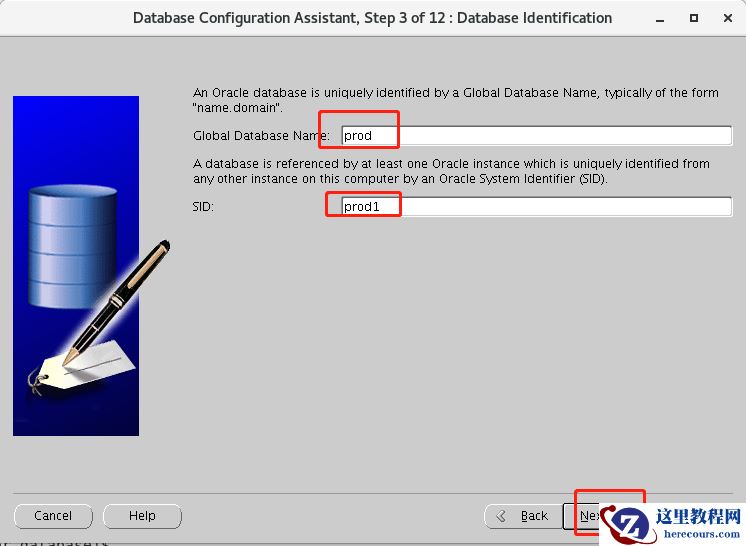
Oracle_sid |
prod1 |
|
dbname |
prod |
|
home |
/home/oracle |
|
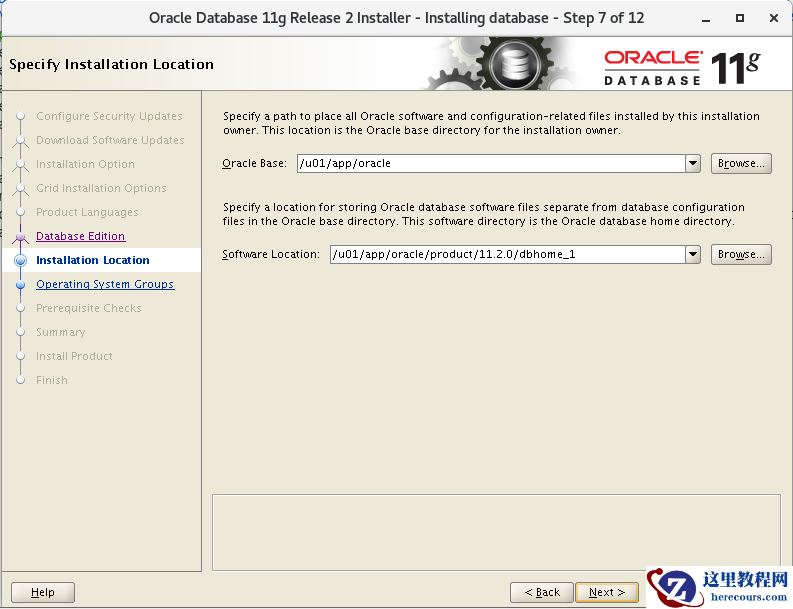
ORACLE_BASE |
/u01/app/oracle |
|
ORACLE_HOME |
/u01/app/oracle/product/11.2.0/dbhome_1 |
1、安装需要的软件列表
yum install binutils -y
yum install compat-libcap1 -y
yum install compat-libstdc -y
yum install gcc -y
yum install gcc-c++ -y
yum install glibc -y
yum install glibc-devel -y
yum install ksh -y
yum install libgcc -y
yum install libstdc++ -y
yum install libstdc++-devel -y
yum install libaio -y
yum install libaio-devel -y
yum install libXext -y
yum install libXtst -y
yum install libX11 -y
yum install libXau -y
yum install libxcb -y
yum install libXi -y
yum install make -y
yum install sysstat -y
yum install unixODBC -y
yum install unixODBC-devel –y
2、修改主机名,更改hosts文件
[root@localhost ~]# hostnamectl set-hostname dbserver
[root@dbserver ~]# vi /etc/hosts
[root@dbserver ~]# cat /etc/hosts
127.0.0.1   localhost localhost.localdomain localhost4 localhost4.localdomain4
::1         localhost localhost.localdomain localhost6 localhost6.localdomain6
10.8.98.102 dbserver
[root@dbserver ~]#
3、添加组与用户,并修改oracle用户密码
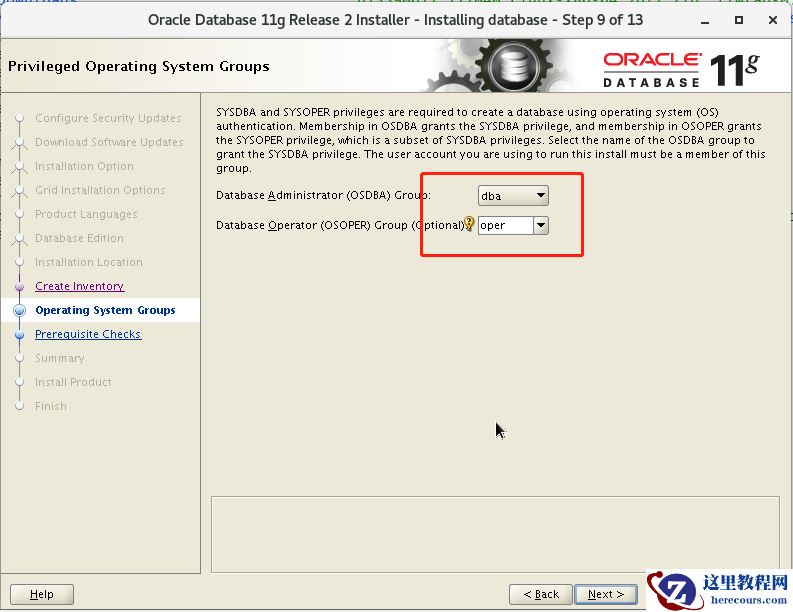
/usr/sbin/groupadd -g 60001 oinstall
/usr/sbin/groupadd -g 60002 dba
/usr/sbin/groupadd -g 60003 oper
/usr/sbin/useradd -u 61002 -g oinstall -G dba oracle
[root@dbserver ~]# passwd oracle
4、创建相应的文件夹
mkdir -p /u01/app/oracle/product/11.2.0/dbhome_1
chown -R oracle:oinstall /u01
chmod -R 775 /u01/
5、修改操作系统参数
vi /etc/security/limits.conf
添加以下
#ORACLE SETTING
oracle               soft    nproc   16384
oracle               hard    nproc   16384
oracle               soft    nofile  1024
oracle               hard    nofile  65536
oracle   	     soft   stack    10240
oracle  	     hard   stack    32768
6、禁用SELINUX
[root@dbserver ~]# cat /etc/selinux/config
# This file controls the state of SELinux on the system.
# SELINUX= can take one of these three values:
#     enforcing - SELinux security policy is enforced.
#     permissive - SELinux prints warnings instead of enforcing.
#     disabled - No SELinux policy is loaded.
SELINUX=disabled
# SELINUXTYPE= can take one of three values:
#     targeted - Targeted processes are protected,
#     minimum - Modification of targeted policy. Only selected processes are protected.
#     mls - Multi Level Security protection.
SELINUXTYPE=targeted
[root@dbserver ~]#
让SELINUX生效:
setenforce 0
7、关闭防火墙
[root@dbserver ~]# systemctl stop firewalld
[root@dbserver ~]# systemctl disable firewalld
8、修改/etc/pam.d/login文件
vi /etc/pam.d/login
#ORACLE SETTING
session    required     pam_limits.so
9、修改sysctl.conf配置文件
[root@dbserver ~]# vi /etc/sysctl.conf
添加一下
#ORACLE SETTING
fs.aio-max-nr = 1048576
fs.file-max = 6815744
kernel.shmmax = 8589934592
kernel.shmall = 2097152
kernel.shmmni = 4096
kernel.sem = 250 32000 100 128
net.ipv4.ip_local_port_range = 9000 65500
net.core.rmem_default = 262144
net.core.rmem_max = 4194304
net.core.wmem_default = 262144
net.core.wmem_max = 1048586
若为2G内存则设置#kernel.shmmax = 2147483648 (2*1024*1024*1024)#kernel.shmall = 524288 (物理内存2*1024*1024*1024/4K)(大于SGA,小于物理内存,例:物理内存90%) 若为8G内存设置为(其余类推)#kernel.shmmax = 8589934592 #kernel.shmall = 2097152 让配置生效:sysctl -p 10、oracle环境变量设置
[oracle@dbserver ~]$ vi .bash_profile
添加以下
# Oracle Settings oracle
TMP=/tmp; export TMP
TMPDIR=$TMP; export TMPDIR
export
ORACLE_BASE=/u01/app/oracle; export ORACLE_BASE
ORACLE_HOME=$ORACLE_BASE/product/11.2.0/dbhome_1; export ORACLE_HOME
ORACLE_SID=prod1; export ORACLE_SID
ORACLE_TERM=xterm; export ORACLE_TERM
PATH=/usr/sbin:$PATH; export PATH
PATH=$ORACLE_HOME/bin:$PATH; export PATH
LD_LIBRARY_PATH=$ORACLE_HOME/lib:/lib:/usr/lib; export LD_LIBRARY_PATH
CLASSPATH=$ORACLE_HOME/JRE:$ORACLE_HOME/jlib:$ORACLE_HOME/rdbms/jlib; export CLASSPATH
NLS_DATE_FORMAT="yyyy-mm-dd HH24:MI:SS"; export NLS_DATE_FORMAT
NLS_LANG=AMERICAN_AMERICA.ZHS16GBK;export NLS_LANG
注意: 此处最后一行我语言选择的是ZHS16GBK
退出oracle再登陆检查一下oracle环境变量有没设置好
[oracle@dbserver ~]$ env | grep ORACLE
ORACLE_SID=prod1
ORACLE_BASE=/u01/app/oracle
ORACLE_TERM=xterm
ORACLE_HOME=/u01/app/oracle/product/11.2.0/dbhome_1
[oracle@dbserver ~]$
上传oracle文件到/home/oracle 目录,注意权限问题,都给oracle用户权限
[oracle@dbserver ~]$ ll
total 2487476
drwxr-xr-x  7 oracle oinstall        136 Aug 27  2013 database
drwxr-xr-x  2 oracle oinstall          6 Aug 31 08:47 Desktop
drwxr-xr-x  2 oracle oinstall          6 Aug 31 08:47 Documents
drwxr-xr-x  2 oracle oinstall          6 Aug 31 08:47 Downloads
drwxr-xr-x  2 oracle oinstall          6 Aug 31 08:47 Music
-rwxr-xr-x. 1 oracle oinstall 1395582860 Aug 30 16:40 p13390677_112040_Linux-x86-64_1of7.zip
-rwxr-xr-x. 1 oracle oinstall 1151304589 Aug 30 16:40 p13390677_112040_Linux-x86-64_2of7.zip
drwxr-xr-x  2 oracle oinstall          6 Aug 31 08:47 Pictures
drwxr-xr-x  2 oracle oinstall          6 Aug 31 08:47 Public
-rwxr-xr-x. 1 oracle oinstall     279608 Aug 30 16:40 rlwrap-0.42.tar.gz
drwxr-xr-x  2 oracle oinstall          6 Aug 31 08:47 Templates
drwxr-xr-x  2 oracle oinstall          6 Aug 31 08:47 Videos
[oracle@dbserver ~]$
重启一下系统 11、root安装vnc,oracle启动vnc
切换到root安装vnc,通过vnc安装oracle
[root@dbserver ~]# yum install *vnc*

 切换到oracle 启动vnc
[oracle@dbserver ~]$ vncserver
You will require a password to access your desktops.
Password:
Verify:
Would you like to enter a view-only password (y/n)? n
A view-only password is not used
New 'dbserver:1 (oracle)' desktop is dbserver:1
Creating default startup script /home/oracle/.vnc/xstartup
Creating default config /home/oracle/.vnc/config
Starting applications specified in /home/oracle/.vnc/xstartup
Log file is /home/oracle/.vnc/dbserver:1.log
[oracle@dbserver ~]$
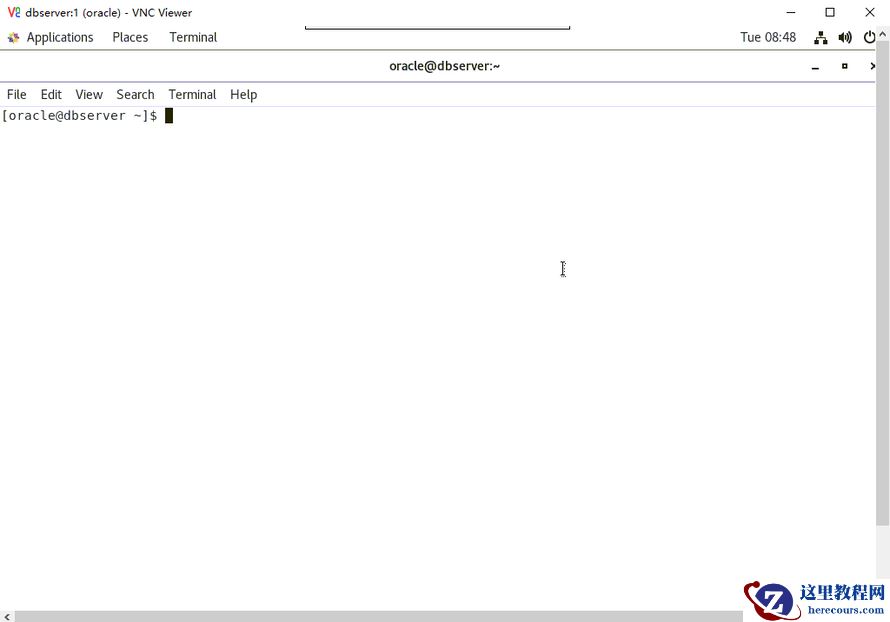
12、通过vnc客户端连接,准备开始安装数据库
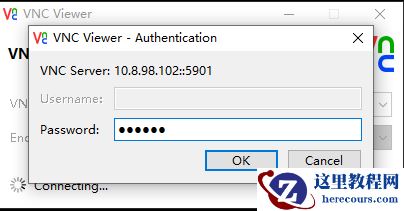
以下通过vnc在图形界面进行操作
通过图形界面进入相应目录,解压oracle软件
[oracle@dbserver ~]$ pwd
/home/oracle
[oracle@dbserver ~]$ ls
Desktop Documents Downloads Music p13390677_112040_Linux-x86-64_1of7.zip p13390677_112040_Linux-x86-64_2of7.zip Pictures Public rlwrap-0.42.tar.gz Templates Videos
[oracle@dbserver ~]$ unzip p13390677_112040_Linux-x86-64_1of7.zip
[oracle@dbserver ~]$ unzip p13390677_112040_Linux-x86-64_2of7.zip
进入解压后的database文件夹,执行./runInstaller命令
[oracle@dbserver database]$ ls
install readme.html response rpm runInstaller sshsetup stage welcome.html
[oracle@dbserver database]$ pwd
/home/oracle/database
[oracle@dbserver database]$ ./runInstaller
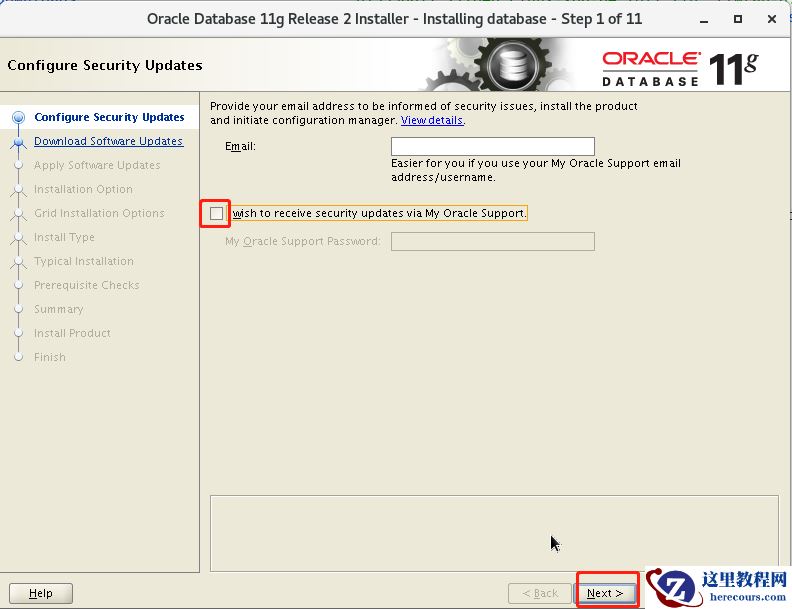
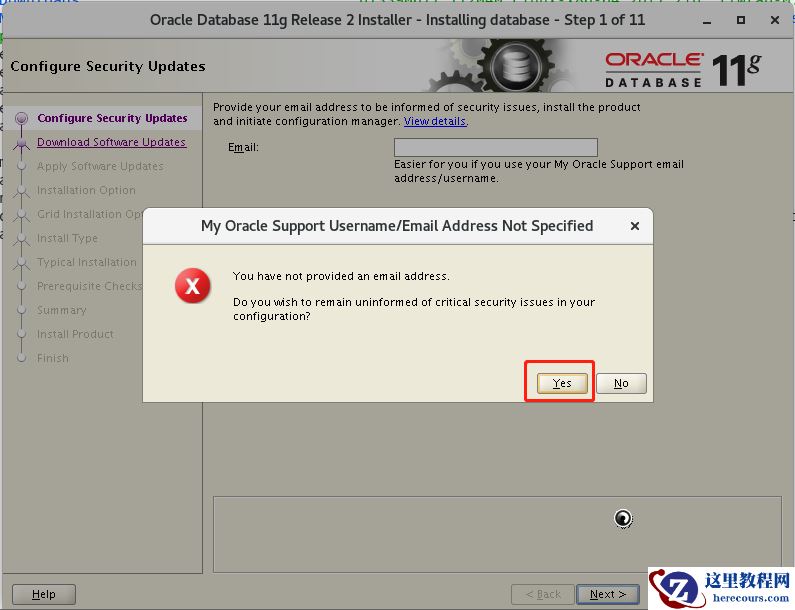
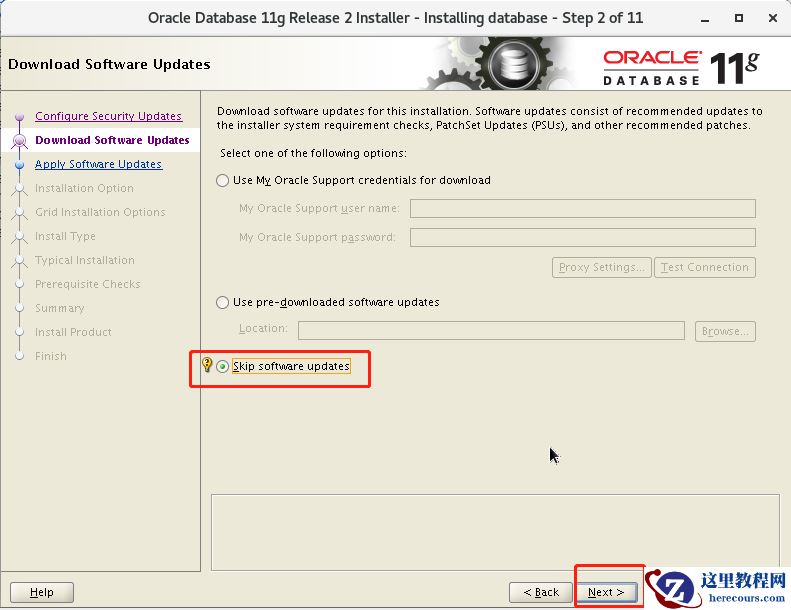
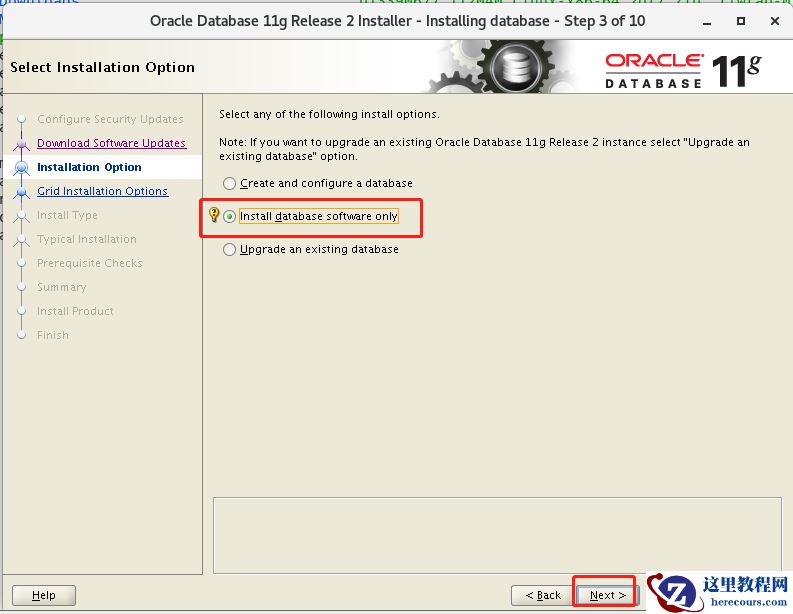
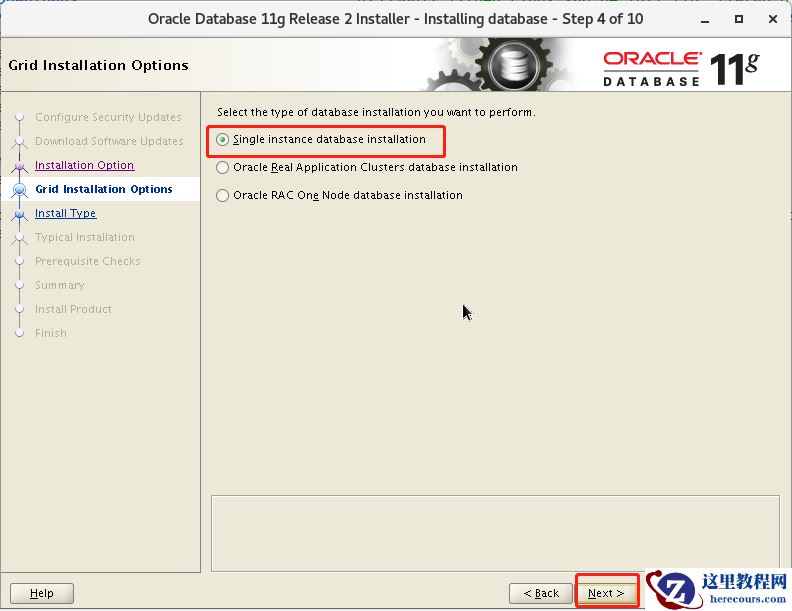
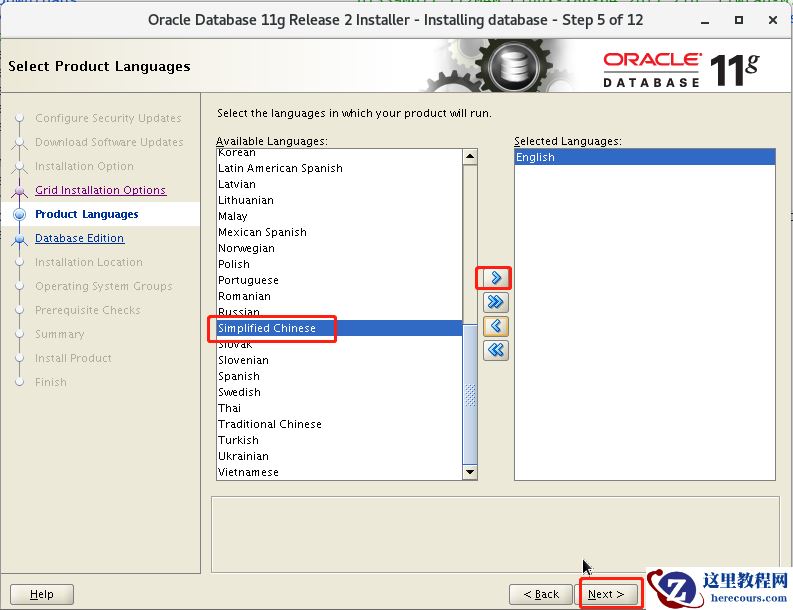
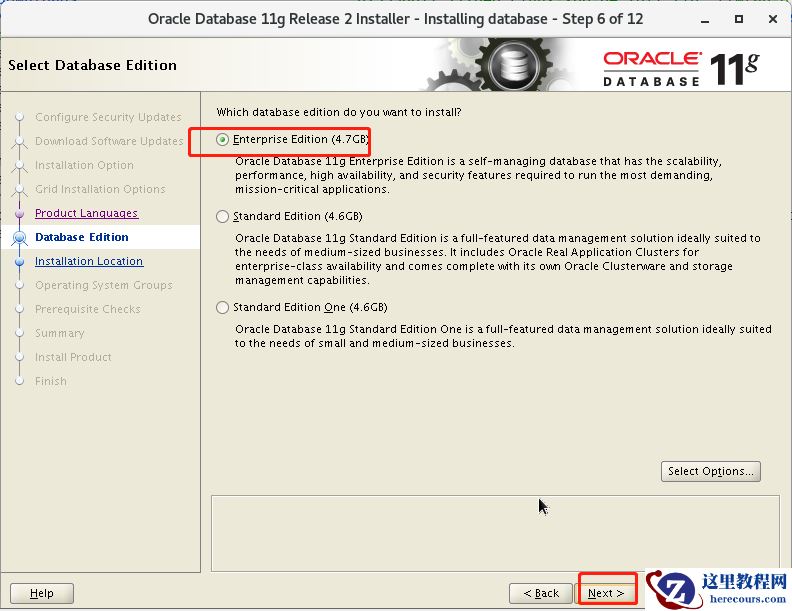
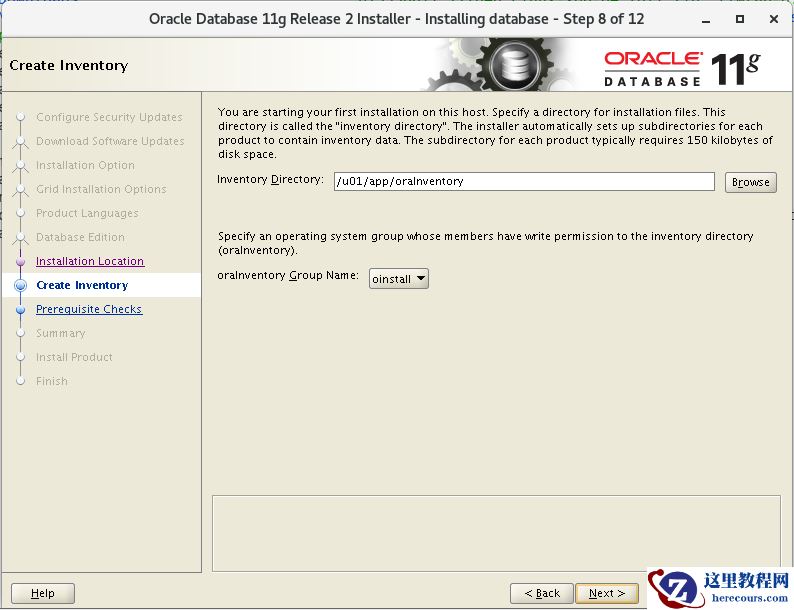
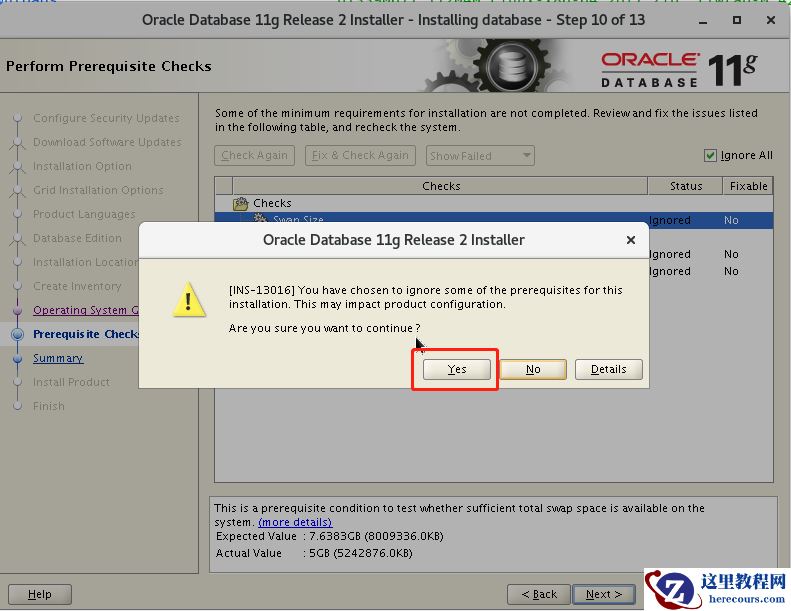
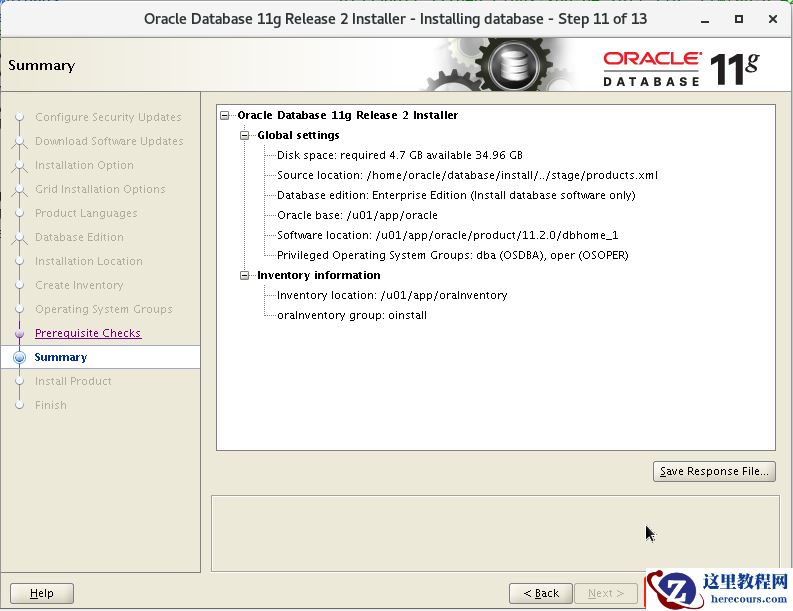
四、仅安装数据库软件一步一步如下图所示

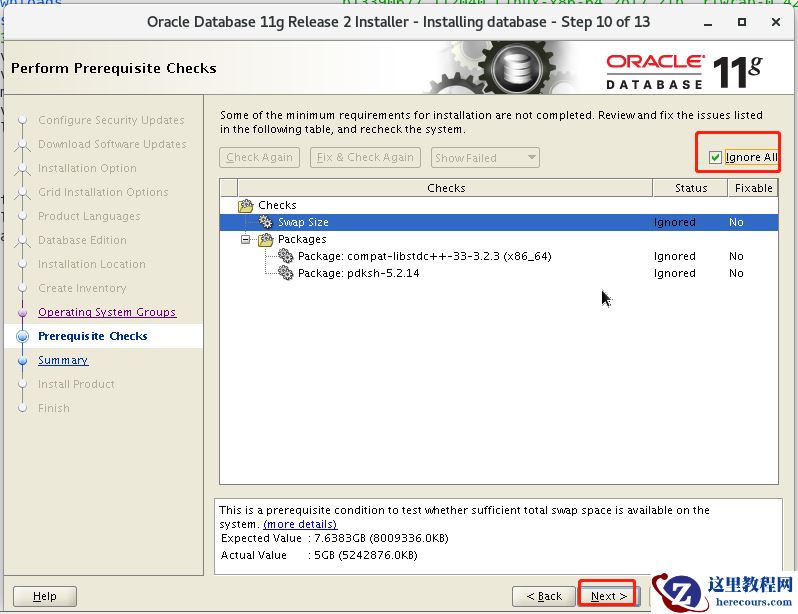 可以通过root账户尝试安装这几个缺的软件包。

86%
报错:Error in invoking target 'agent nmhs' of makefile
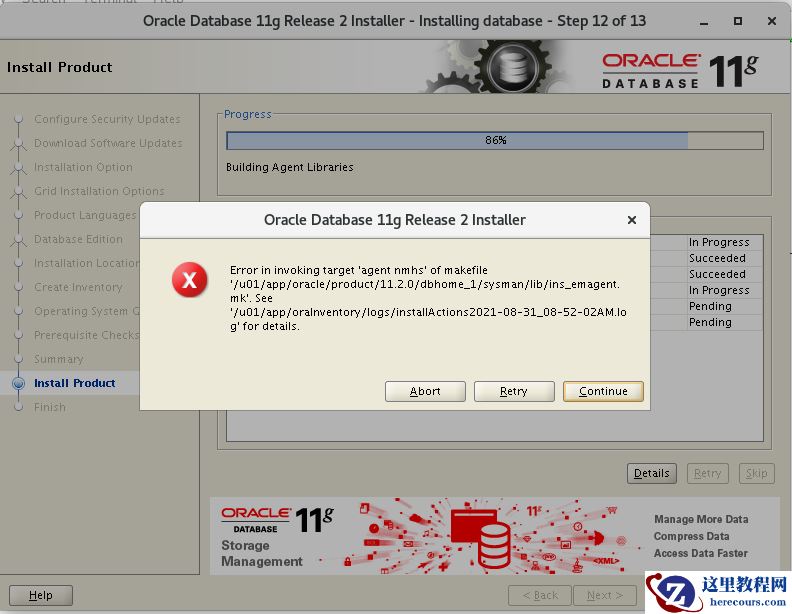 解决方案:
解决方案:
在 makefile中添加链接libnnz11库的参数 修改 $ORACLE_HOME/sysman/lib/ins_emagent.mk,将 $(MK_EMAGENT_NMECTL)修改为:
$(MK_EMAGENT_NMECTL) -lnnz11 建议修改前备份原始文件
[oracle@dbserver lib]$ cd $ORACLE_HOME/sysman/lib
[oracle@dbserver lib]$ cp ins_emagent.mk ins_emagent.mk.bak
[oracle@dbserver lib]$ vi ins_emagent.mk
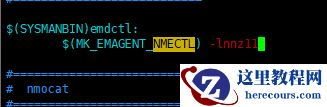
进入vi编辑器后 命令模式输入 /NMECTL 进行查找,快速定位要修改的行
原来:
$(SYSMANBIN)emdctl:
$(MK_EMAGENT_NMECTL)
修改后:
$(SYSMANBIN)emdctl:
$(MK_EMAGENT_NMECTL) -lnnz11
保存退出后
retry

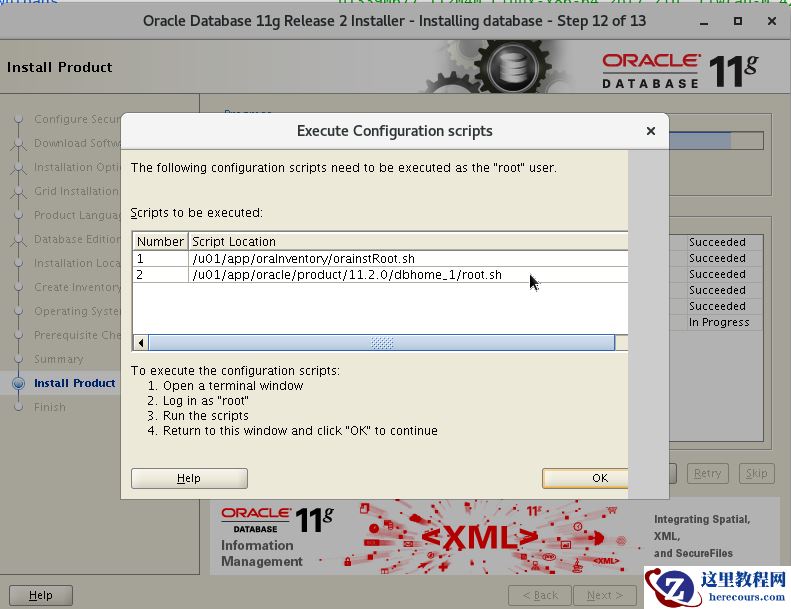
root 账户执行这两个脚本 ,执行完再点击上图的ok
[root@dbserver /]# /u01/app/oraInventory/orainstRoot.sh
Changing permissions of /u01/app/oraInventory.
Adding read,write permissions for group.
Removing read,write,execute permissions for world.

Changing groupname of /u01/app/oraInventory to oinstall.
The execution of the script is complete.
[root@dbserver /]# /u01/app/oracle/product/11.2.0/dbhome_1/root.sh
Performing root user operation for Oracle 11g

The following environment variables are set as:
    ORACLE_OWNER= oracle
    ORACLE_HOME=  /u01/app/oracle/product/11.2.0/dbhome_1

Enter the full pathname of the local bin directory: [/usr/local/bin]:
   Copying dbhome to /usr/local/bin ...
   Copying oraenv to /usr/local/bin ...
   Copying coraenv to /usr/local/bin ...


Creating /etc/oratab file...
Entries will be added to the /etc/oratab file as needed by
Database Configuration Assistant when a database is created
Finished running generic part of root script.
Now product-specific root actions will be performed.
Finished product-specific root actions.
[root@dbserver /]#
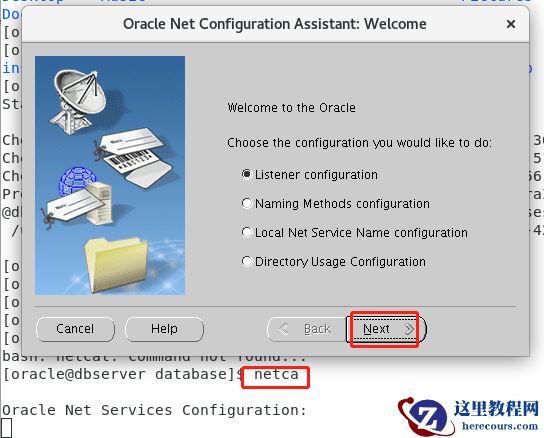
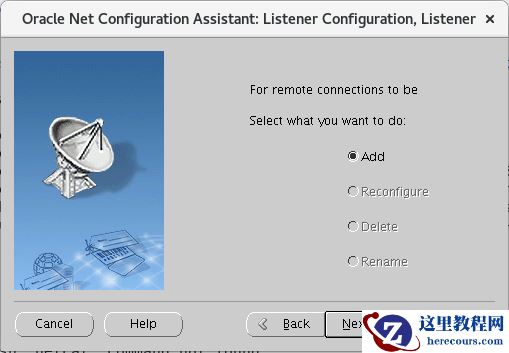
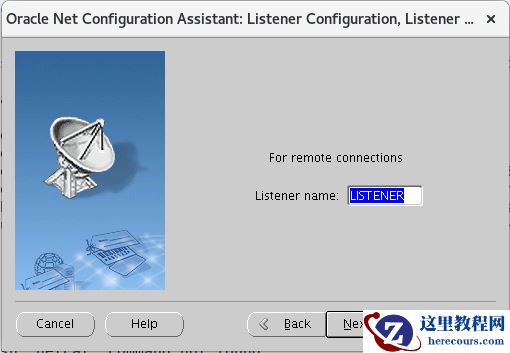
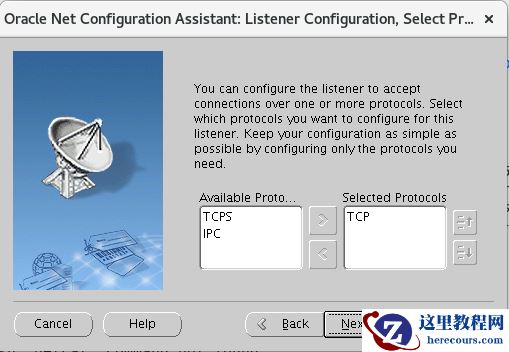
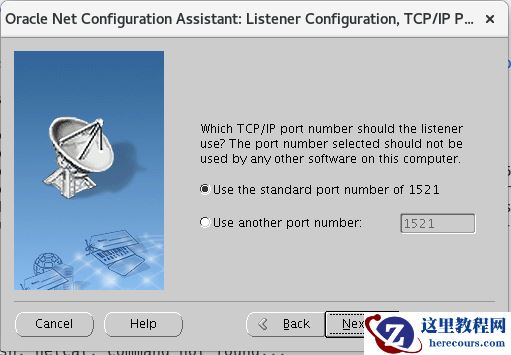
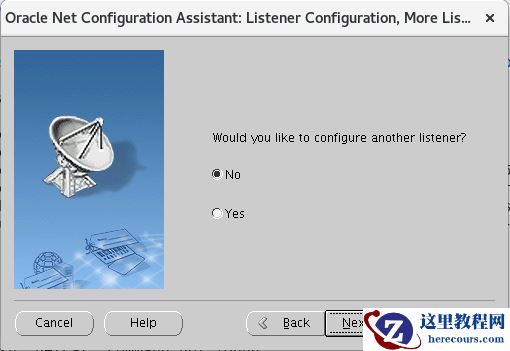
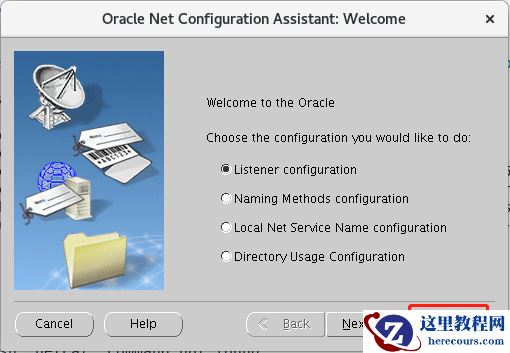
 五、netca调出图形界面创建监听

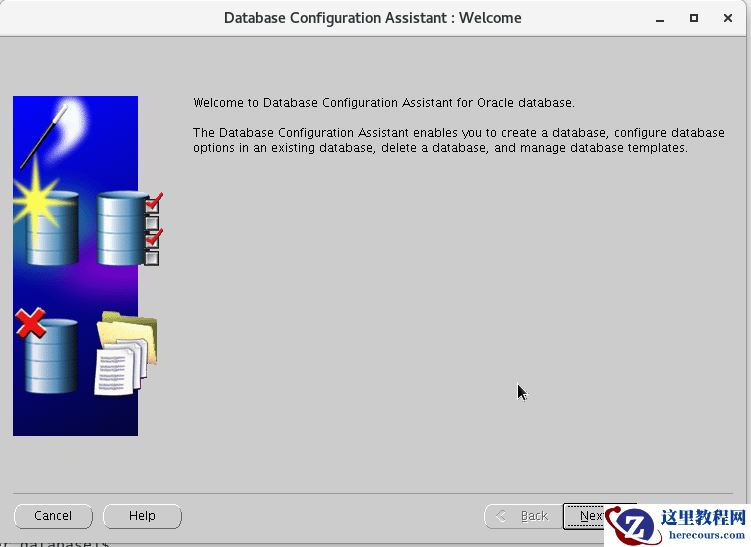
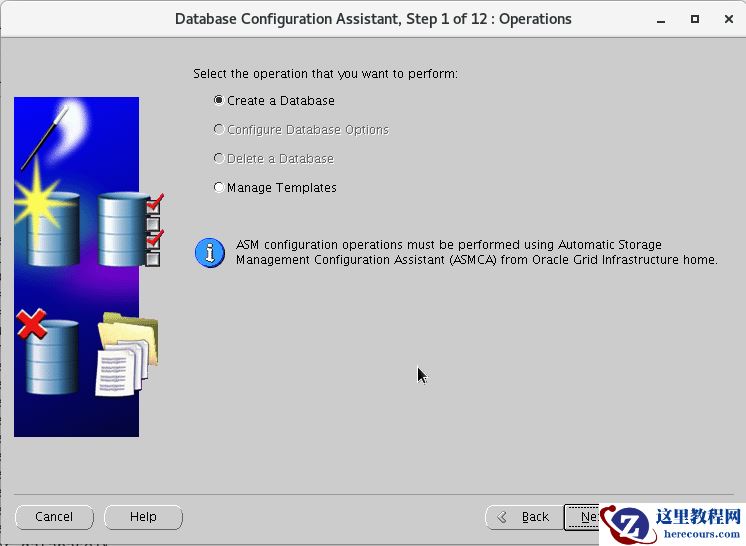
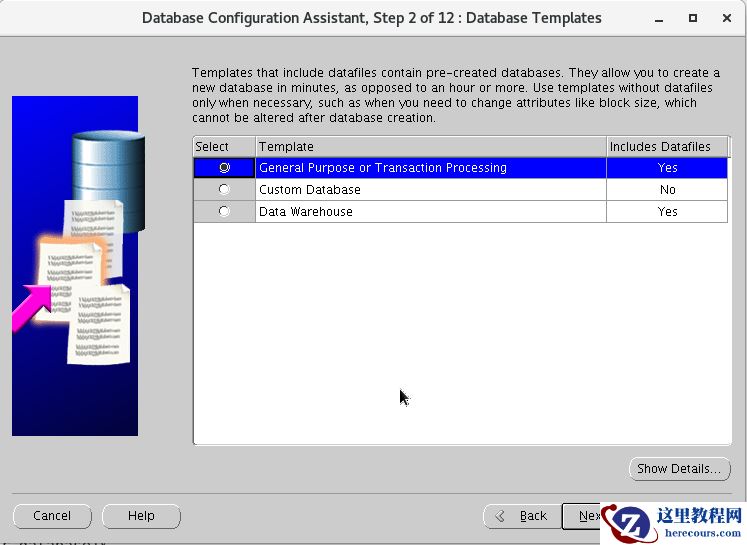
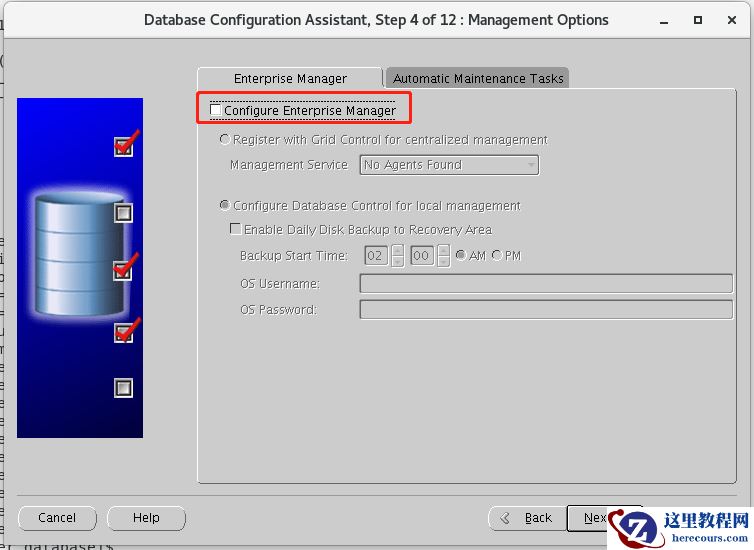
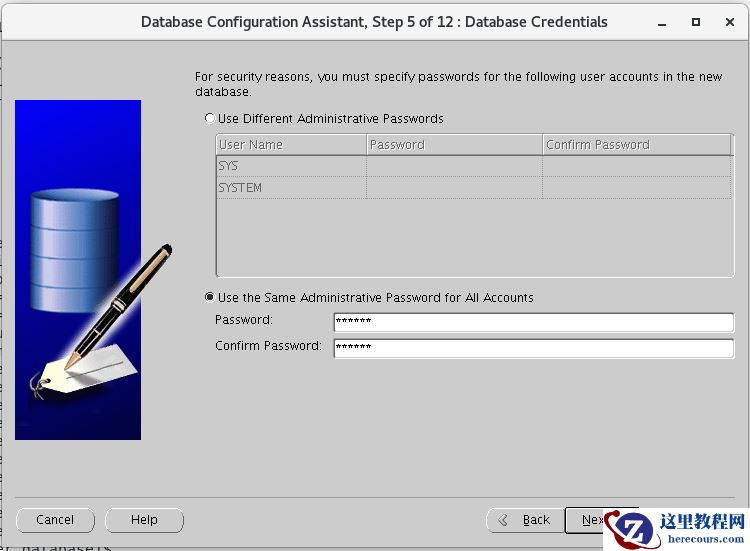
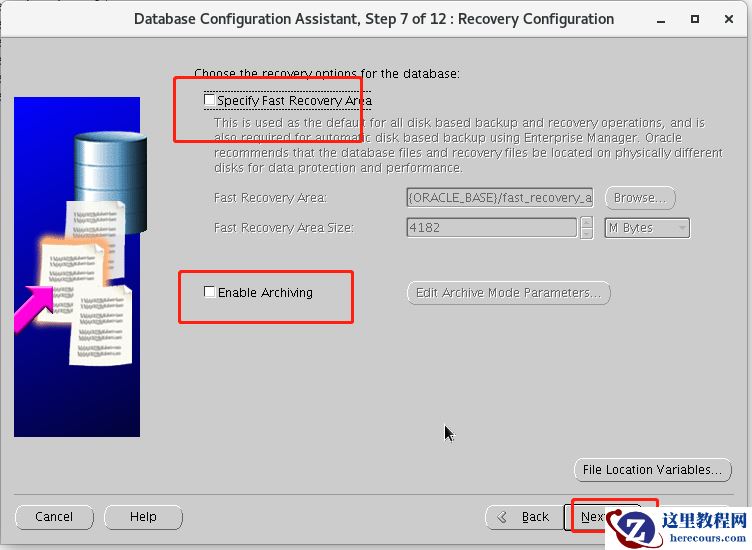
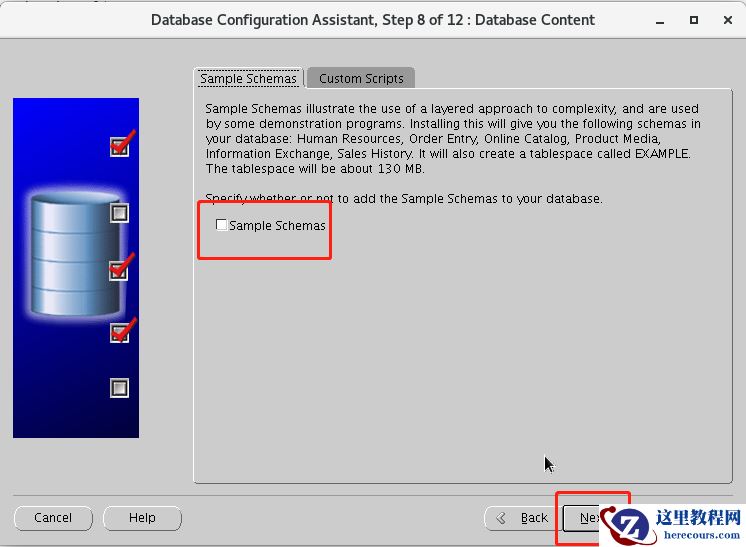
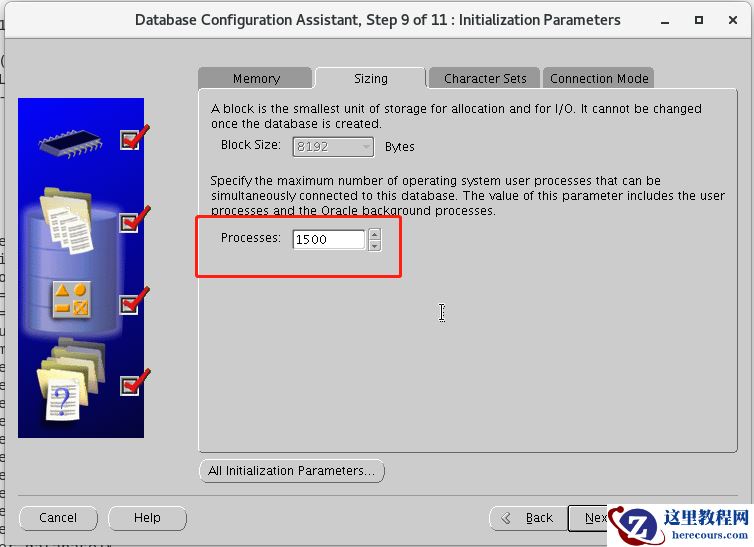
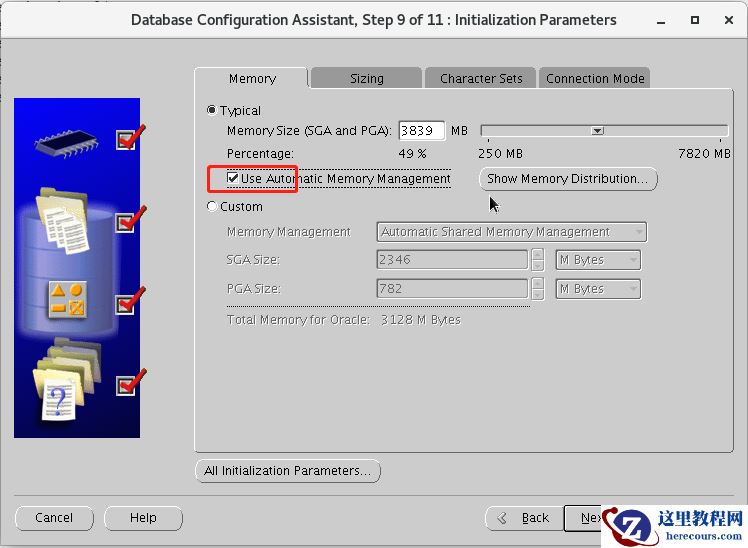
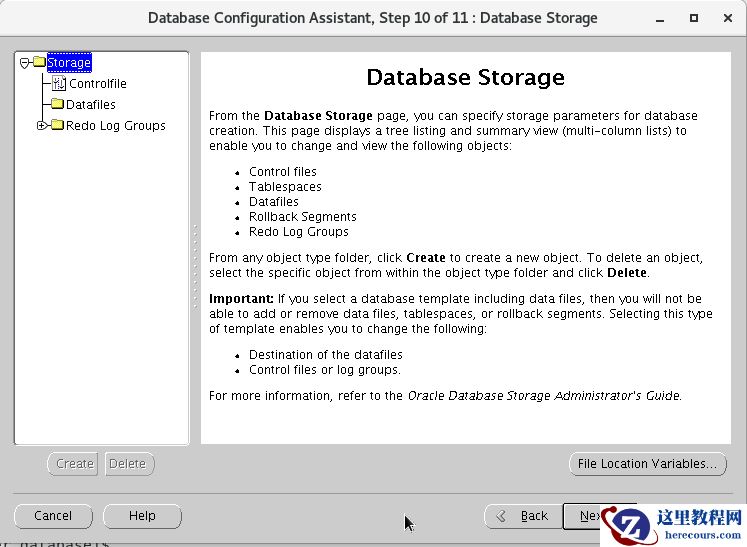
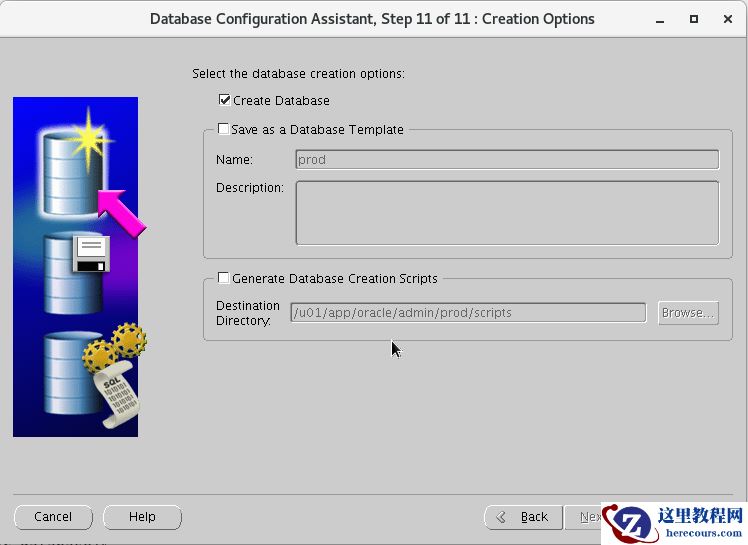
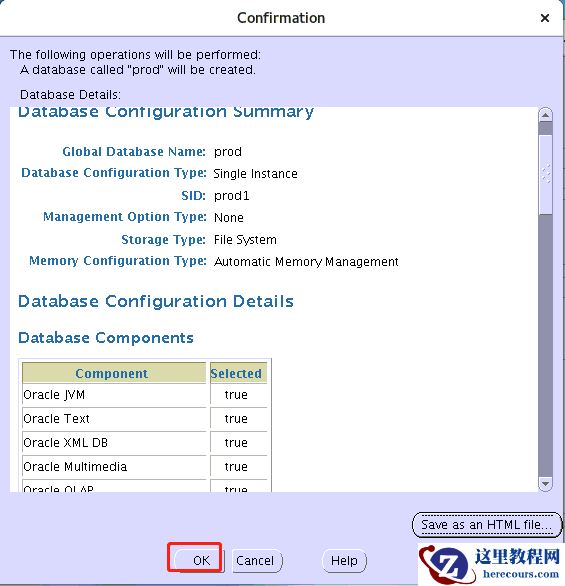
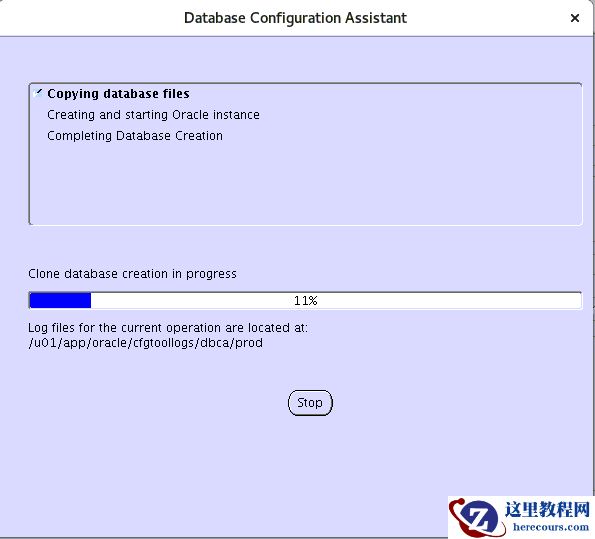
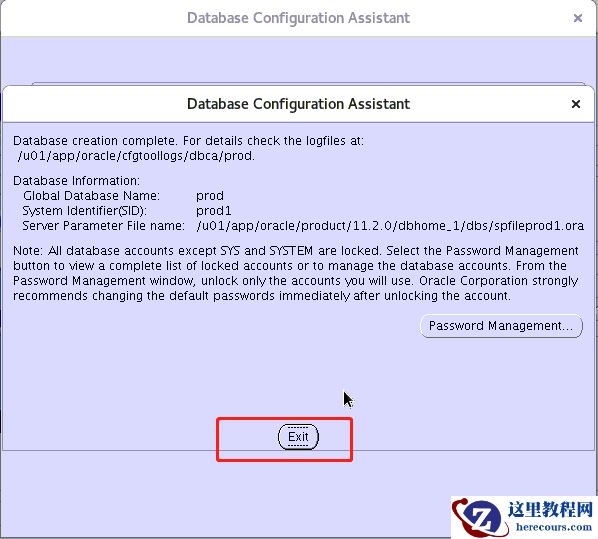
 六、dbca创建数据库如下


 七、登陆数据库查看是否正常
[oracle@dbserver ~]$ sqlplus / as sysdba
SQL*Plus: Release 11.2.0.4.0 Production on Tue Aug 31 11:17:53 2021
Copyright (c) 1982, 2013, Oracle.  All rights reserved.
Connected to:
Oracle Database 11g Enterprise Edition Release 11.2.0.4.0 - 64bit Production
With the Partitioning, OLAP, Data Mining and Real Application Testing options
SQL> select * from dual;
D
-
X
SQL>


