1.系统安装: 安装Centos7.4 桌面版本,注意,swap分区要是内存的2倍 2.系统安装完成后 #安装工具包 yum install -y vim wget net-tools unzip zip #安装依赖yum -y install binutils compat-libcap1 compat-libstdc++-33 compat-libstdc++-33*i686 compat-libstdc++-33*.devel compat-libstdc++-33 compat-libstdc++-33*.devel gcc gcc-c++ glibc glibc*.i686 glibc-devel glibc-devel*.i686 ksh libaio libaio*.i686 libaio-devel libaio-devel*.devel libgcc libgcc*.i686 libstdc++ libstdc++*.i686 libstdc++-devel libstdc++-devel*.devel libXi libXi*.i686 libXtst libXtst*.i686 make sysstat unixODBC unixODBC*.i686 unixODBC-devel unixODBC-devel*.i686 #关闭selinux、防火墙 systemctl stop firewalld.service systemctl disable firewalld.service firewall-cmd --state sed -i '/^SELINUX=.*/c SELINUX=disabled' /etc/selinux/config sed -i 's/^SELINUXTYPE=.*/SELINUXTYPE=disabled/g' /etc/selinux/config grep --color=auto '^SELINUX' /etc/selinux/config setenforce 0 # 创建用户和组 groupadd oinstall groupadd dba groupadd oper useradd -g oinstall -G dba,oper oracle echo "123456" | passwd --stdin oracle #oracle用户的登录密码,后续登录要用,记着。 #创建目录 mkdir -p /u01/app/oracle/ chown -R oracle:oinstall /u01/app chmod -R 775 /u01/app #修改系统参数 echo ' * soft nofile 655350 * hard nofile 655350 * soft nproc 655350 * hard nproc 655350 * soft stack 6553600 * hard stack 655360 * soft memlock unlimited * hard memlock unlimited * soft core unlimited * hard core unlimited '>>/etc/security/limits.conf echo ' # Controls IP packet forwarding net.ipv4.ip_forward = 0 # Controls source route verification net.ipv4.conf.default.rp_filter = 1 # Do not accept source routing net.ipv4.conf.default.accept_source_route = 0 # Controls the System Request debugging functionality of the kernel kernel.sysrq = 0 # Controls whether core dumps will append the PID to the core filename. # Useful for debugging multi-threaded applications. kernel.core_uses_pid = 1 # Controls the use of TCP syncookies net.ipv4.tcp_syncookies = 1 # Disable netfilter on bridges. net.bridge.bridge-nf-call-ip6tables = 0 net.bridge.bridge-nf-call-iptables = 0 net.bridge.bridge-nf-call-arptables = 0 # Controls the default maxmimum size of a mesage queue kernel.msgmnb = 65536 # Controls the maximum size of a message, in bytes kernel.msgmax = 65536 # Controls the maximum shared segment size, in bytes kernel.shmmax = 68719476736 # Controls the maximum number of shared memory segments, in pages kernel.shmall = 4294967296 net.ipv4.tcp_syncookies = 1 net.ipv4.tcp_tw_reuse = 1 net.ipv4.tcp_tw_recycle = 1 net.ipv4.tcp_fin_timeout = 30 net.ipv4.tcp_keepalive_time = 1200 #表示当keepalive起用的时候,TCP发送keepalive消息的频度。缺省是2小时,改为20分钟。 net.ipv4.ip_local_port_range = 1024 65000 ##表示用于向外连接的端口范围。缺省情况下很小:32768到61000,改为1024到65000。 net.ipv4.tcp_max_syn_backlog = 8192 ##表示SYN队列的长度,默认为1024,加大队列长度为8192,可以容纳更多等待连接的网络连接数。 net.ipv4.tcp_max_tw_buckets = 5000 ##表示系统同时保持TIME_WAIT套接字的最大数量,如果超过这个数字,TIME_WAIT套接字将立刻被清除并打印警告信息。 vm.max_map_count=655360 fs.aio-max-nr = 1048576 fs.file-max = 6815744 kernel.sem = 250 32000 100 128 net.core.rmem_default = 262144 net.core.rmem_max = 4194304 net.core.wmem_default = 262144 net.core.wmem_max = 1048586 net.ipv4.ip_local_port_range = 9000 65500 '>/etc/sysctl.conf 添加系统变量 vi ~oracle/.bash_profile export PATH export NLS_LANG="SIMPLIFIED CHINESE_CHINA.AL32UTF8" export ORACLE_BASE=/u01/app/oracle export ORACLE_HOME=$ORACLE_BASE/product/12.2.0/dbhome_1 export ORACLE_SID=orcl export PATH=$ORACLE_HOME/bin:$PATH:HOME/bin export EDITOR=/bin/vi #上传下载的安装包 wget -P /u01/app/oracle cd /orcl/app/oracle #切换用户 su oracle cd /u01/app/oracle unzip linuxx64_12201_database.zip export cd /u01/app/oracle/database #重启 reboot
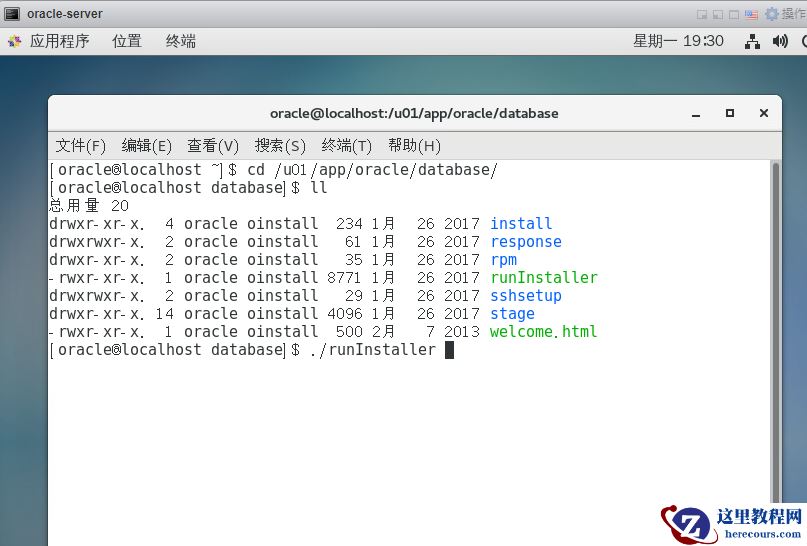
oracle用户登录系统执行安装
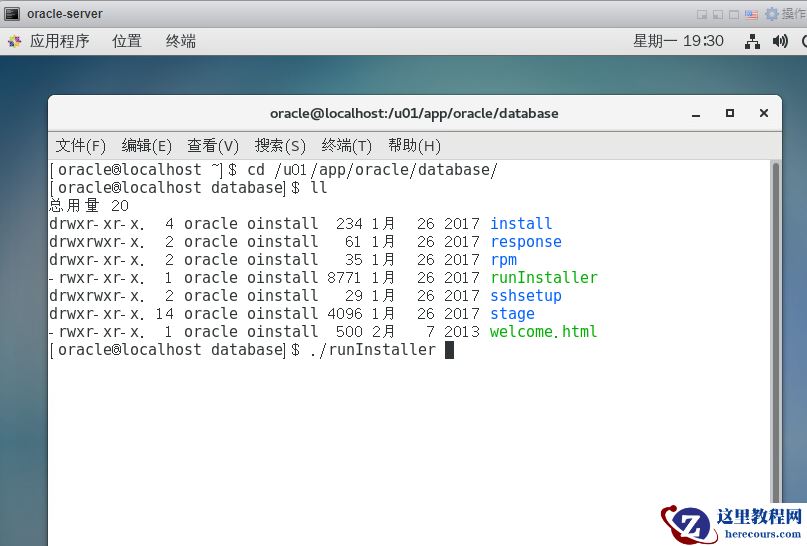
cd /u01/app/oracle/database
./runInstaller
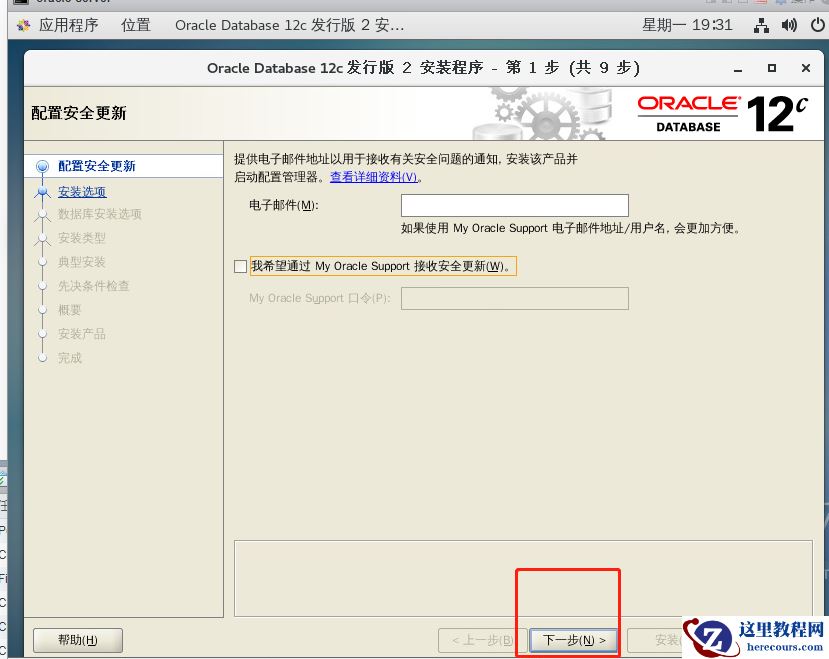
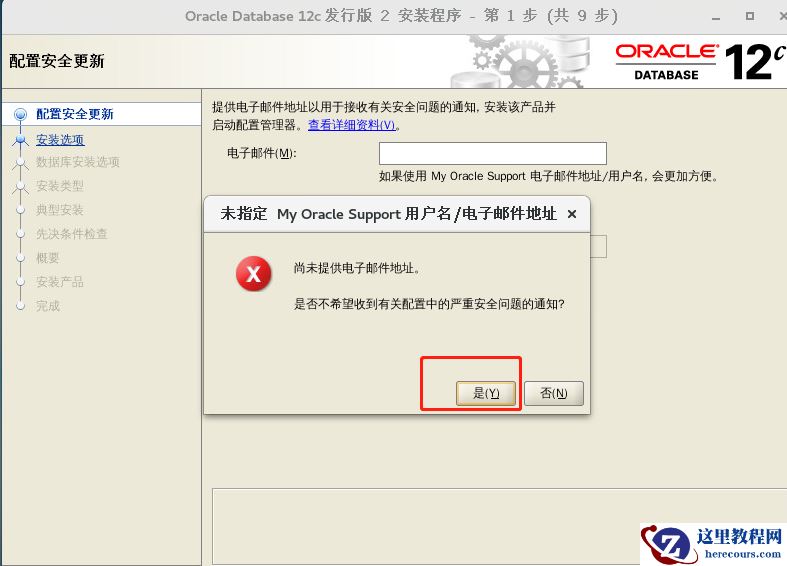
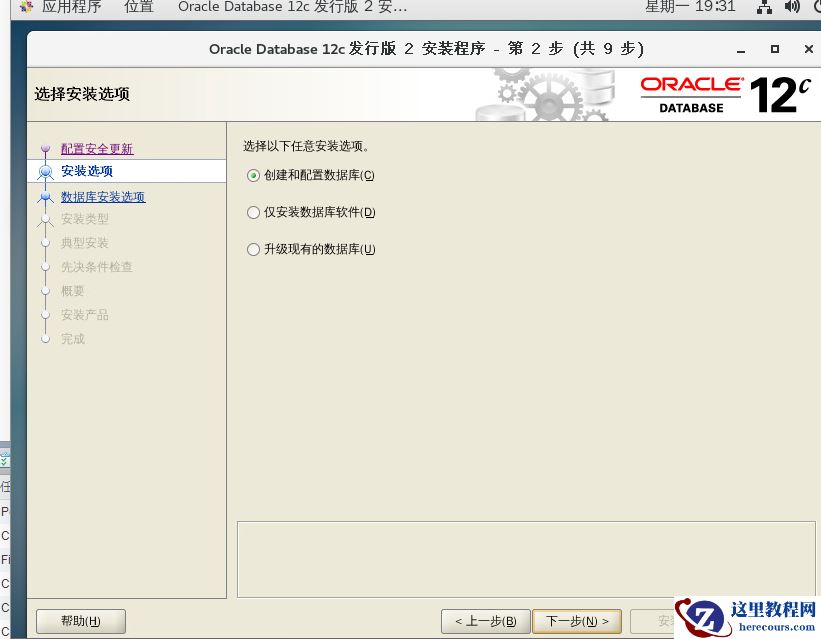
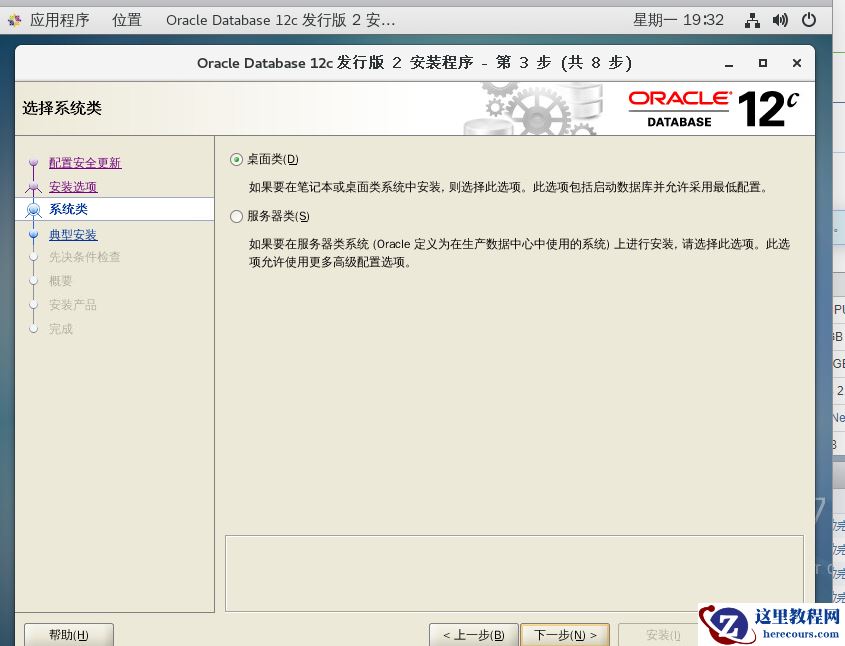
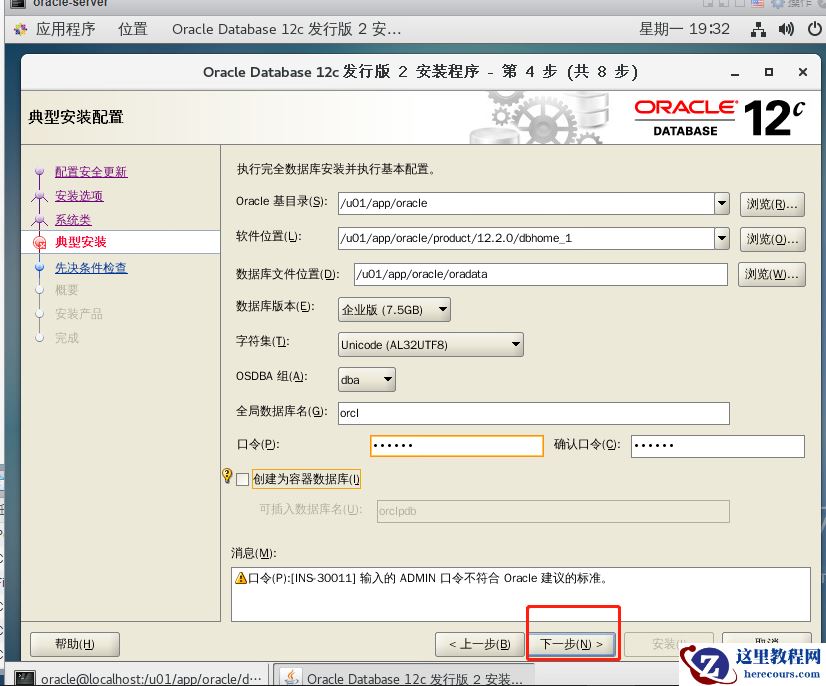
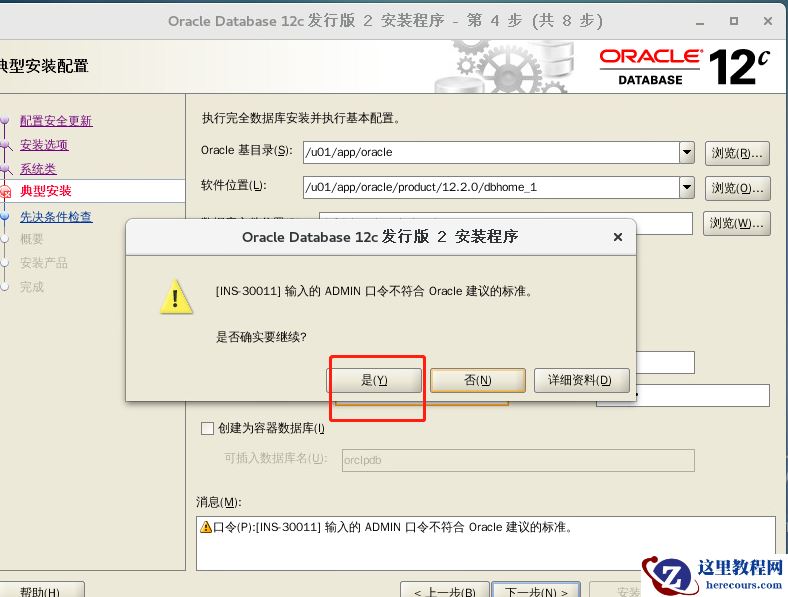
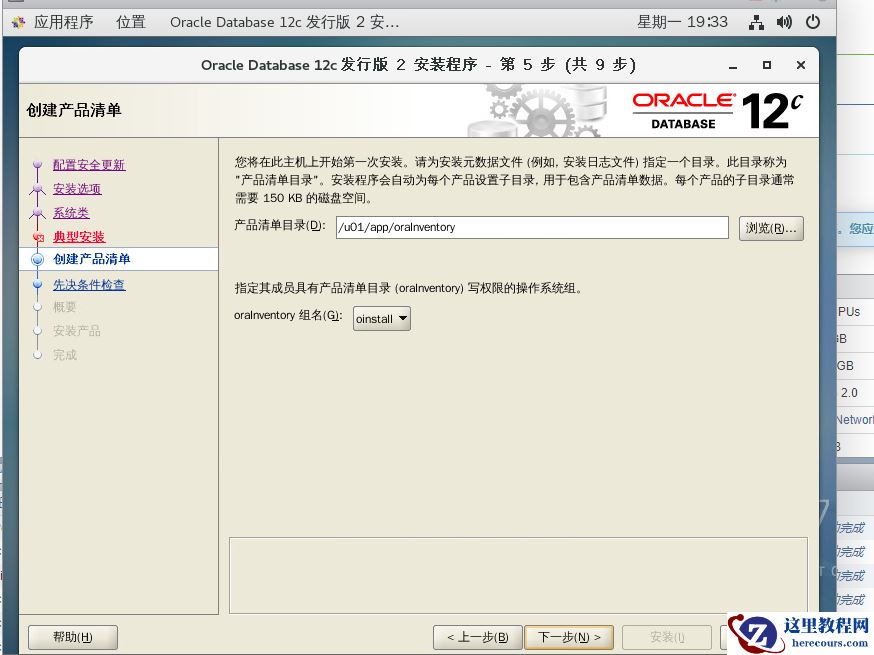
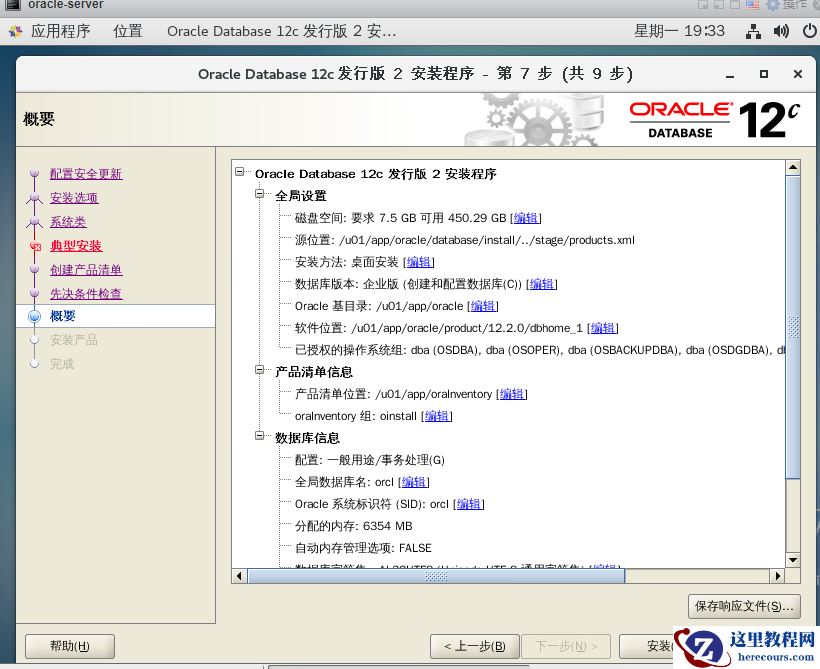
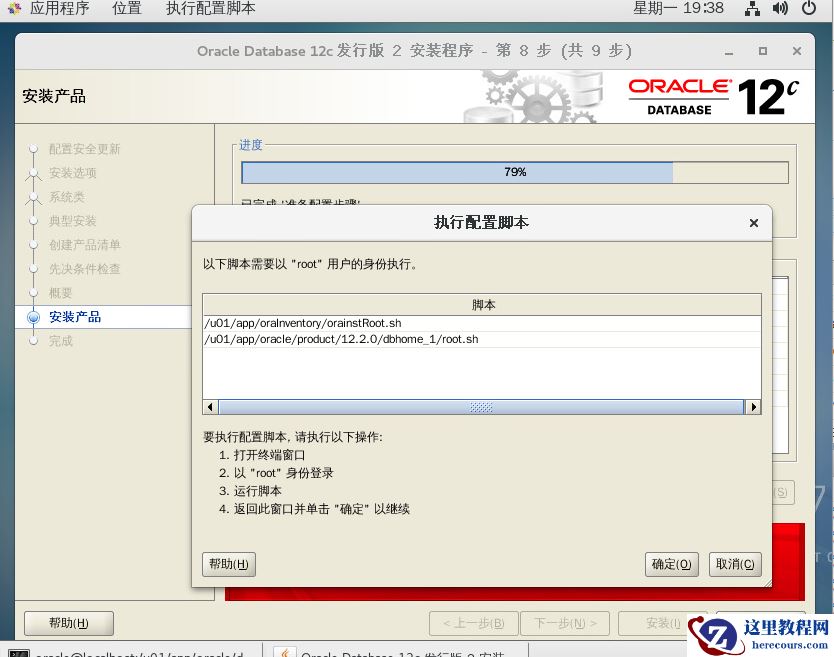
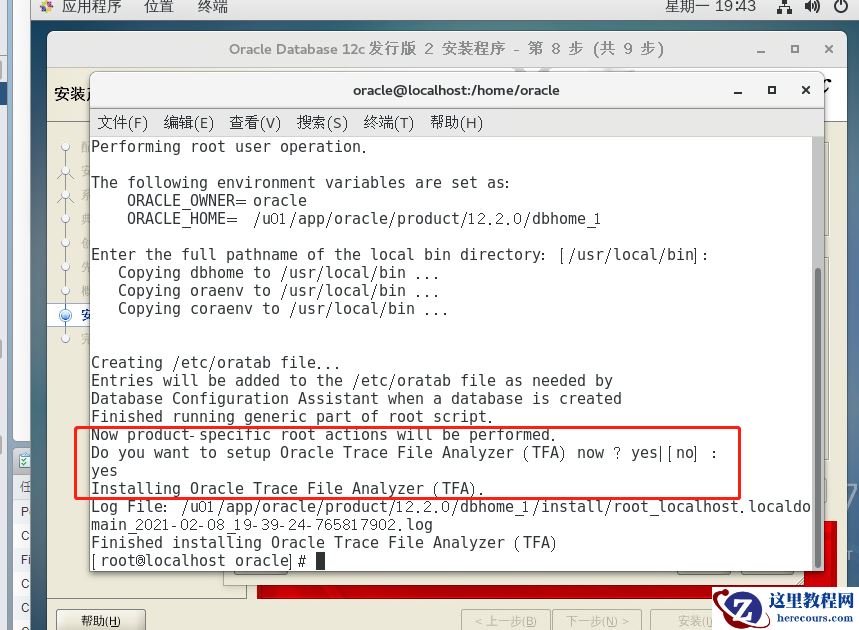
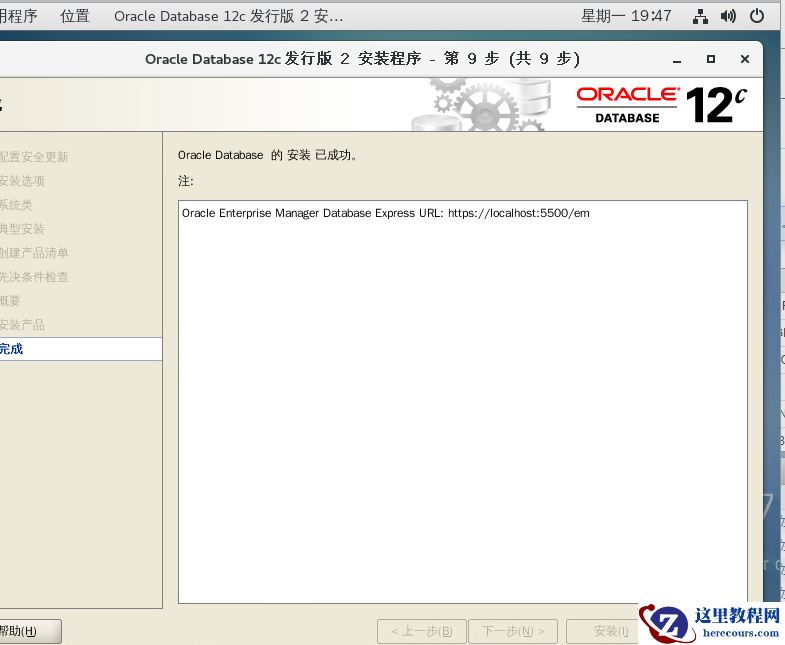
#出现上图画面时,新开一个命令行,切换到root用户 执行2个脚本
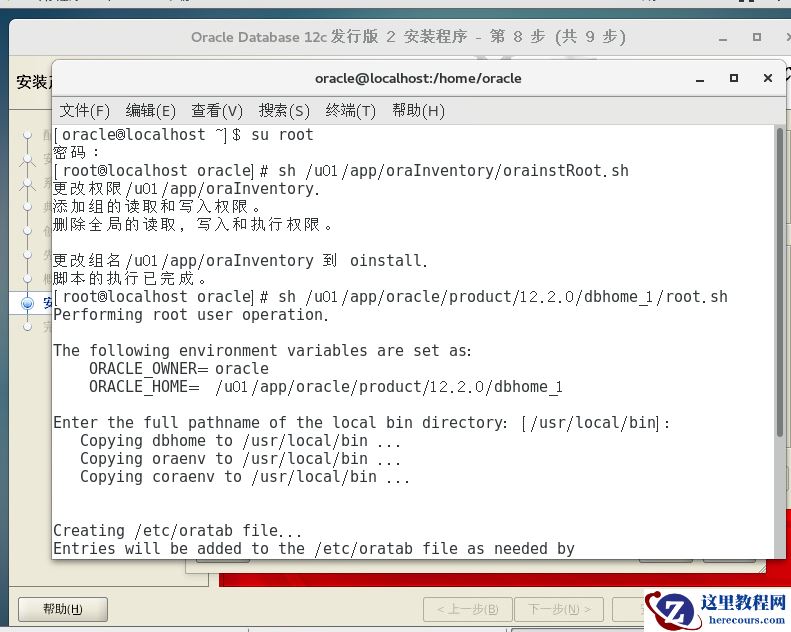
su root
sh /u01/app/oraInventory/orainstRoot.sh   #回车
sh /u01/app/oracle/product/12.2.0/dbhome_1/root.sh  #回车
#常用命令
# 增加文件,扩展表空间
ALTER TABLESPACE USERS ADD DATAFILE '/u01/app/oracle/oradata/orcl/users03.dbf' size 200m autoextend on next 100m maxsize unlimited;
#创建用户和表空间,并授权
create tablespace fang datafile '/u01/app/oracle/oradata/fang.dbf' size 200m autoextend on next 100m maxsize unlimited;
create user fang identified by 123456 default tablespace fang;
grant connect,resource to fang;
grant dba to fang;
#远程访问命令
sqlplus fang/123456@172.16.2.170:1521/orcl
sqlplus sys/password@192.168.0.1:1521/orcl as sysdba
#修改数据库自动增长空间
ALTER DATABASE DATAFILE 'c:SmartDB01.ora' AUTOEXTEND ON NEXT 2G
导入数据
imp fang/123456@172.16.2.170:1521/orcl file=./fang_2020_11_09.dmp  log=./imp_fang_new.log full=y ignore=y  statistics=none
exp fang/123456@172.16.2.170:1521/orcl file=./bj202011211.dmp full=y

#查看表空间大小
select sum(bytes)/(1024*1024) as free_space,tablespace_name    from dba_free_space
    group by tablespace_name;
#查询表空间剩余大小
SELECT temp_used.tablespace_name,
total - used as "Free",
total as "Total",
round(nvl(total - used, 0) * 100 / total, 3) "Free percent"FROM (SELECT tablespace_name, SUM(bytes_used) / 1024 / 1024 used
FROM GV_$TEMP_SPACE_HEADER
GROUP BY tablespace_name) temp_used,
(SELECT tablespace_name, SUM(bytes) / 1024 / 1024 total
FROM dba_temp_files
GROUP BY tablespace_name) temp_total
WHERE temp_used.tablespace_name = temp_total.tablespace_name
ORDER BY B.TABLESPACE, B.SEGFILE#, B.SEGBLK#, B.BLOCKS;
alter database tempfile '/u01/app/oracle/oradata/orcl/temp01.dbf' autoextend on next 500m maxsize unlimited;

drop tablespace fang including contents and datafiles cascade constraint;–删除表空间
#数据库状态
lsnrctl status
dbca 安装数据库
netca 监听器启动安装
netmgrselect * from dual;
查看数据库的并发连接数:select count(*) from v$session where status=‘ACTIVE’;
查看当前数据库建立的会话情况:select sid,serial#,username,program,machine,status from v$session;
查询数据库允许的最大连接数:select value from v$parameter where name = ‘processes’;
或者:show parameter processes;
修改数据库允许的最大连接数:
alter system set processes = 5000 scope = spfile;
(需要重启数据库才能实现连接数的修改)
一、停止EXP/IMP优化速度
可以直接KILL 进程,但先要KILL 父进程,然后KILL子进程,只KILL子进程,EXP/IMP还会在后台执行的
样例:ps -ef |grep imp 查询到pid,kill -9 pid 、kill -9 ppid,就可以了  一、停止EXP/IMP优化速度
可以直接KILL 进程,但先要KILL 父进程,然后KILL子进程,只KILL子进程,EXP/IMP还会在后台执行的
样例:ps -ef |grep imp 查询到pid,kill -9 pid 、kill -9 ppid,就可以了  ps -ef |grep exp
重启数据库:
shutdown immediate;
startup;
编辑推荐:
- Oracle 12C Centos7.4桌面版本安装03-03
- 盘点2019甲骨文 | 从产品转向用户体验03-03
- 要给视频添加固定水印该怎么做?03-03
- [重庆思庄每日技术分享]-数据泵导出数据报39006是什么原因03-03
- 用断、舍、离的思维做软件测试03-03
- 可以将已签收的顺丰快递物流信息改为未签收吗?03-03
- oracle 逻辑结构03-03
- [重庆思庄每日技术分享]-ORACLE 12C 新功能 max_idle_time03-03
相关推荐
-

-
-
-
-
-
-
-
-
-
-
-
-
-
-

雷神推出 MIX PRO II 迷你主机:基于 Ultra 200H,玻璃上盖 + ARGB 灯效
2 月 9 日消息,雷神 (THUNDEROBOT) 现已宣布推出基于英
-

制造商 Musnap 推出彩色墨水屏电纸书 Ocean C:支持手写笔、第三方安卓应用
2 月 10 日消息,制造商 Musnap 现已在海外推出一款 Oce
热文推荐
- Oracle 12C Centos7.4桌面版本安装
Oracle 12C Centos7.4桌面版本安装
26-03-03 - 盘点2019甲骨文 | 从产品转向用户体验

盘点2019甲骨文 | 从产品转向用户体验
26-03-03 - 要给视频添加固定水印该怎么做?
要给视频添加固定水印该怎么做?
26-03-03 - [重庆思庄每日技术分享]-数据泵导出数据报39006是什么原因
![[重庆思庄每日技术分享]-数据泵导出数据报39006是什么原因](https://www.herecours.com/d/file/efpub/2026/03-03/20260303162231844323.jpg?x-oss-process=style/bb "[重庆思庄每日技术分享]-数据泵导出数据报39006是什么原因")
[重庆思庄每日技术分享]-数据泵导出数据报39006是什么原因
26-03-03 - 可以将已签收的顺丰快递物流信息改为未签收吗?
可以将已签收的顺丰快递物流信息改为未签收吗?
26-03-03 - FITURE 、百度、咕咚“围猎”智能健身镜
FITURE 、百度、咕咚“围猎”智能健身镜
26-03-03 - Oracle 19c OCP 1Z0-082认证考试题库1
Oracle 19c OCP 1Z0-082认证考试题库1
26-03-03 - expdp导出报ORA-31693、ORA-02354、ORA-01466
- 在电脑上不同位置的文件怎么同时统一复制
在电脑上不同位置的文件怎么同时统一复制
26-03-03 - OGG微服务版(图形化)
OGG微服务版(图形化)
26-03-03