说明
本次安装将使用 Oracle 通用安装程序 (OUI) 安装 Oracle 数据库软件以及数据库
下Oracle 操作系统要求 :
Oracle Linux 8.1 with the Unbreakable Enterprise Kernel 6: 5.4.17-2011.0.7.el8uek.x86_64 or later
Oracle Linux 8 with the Red Hat Compatible kernel: 4.18.0-80.el8.x86_64 or later
Oracle Linux 7.4 with the Unbreakable Enterprise Kernel 4: 4.1.12-124.19.2.el7uek.x86_64 or later
Oracle Linux 7.4 with the Unbreakable Enterprise Kernel 5: 4.14.35-1818.1.6.el7uek.x86_64 or later
Oracle Linux 7.5 with the Red Hat Compatible kernel: 3.10.0-862.11.6.el7.x86_64 or later
Red Hat Enterprise Linux 8: 4.18.0-80.el8.x86_64 or later
Red Hat Enterprise Linux 7.5: 3.10.0-862.11.6.el7.x86_64 or later
SUSE Linux Enterprise Server 12 SP3: 4.4.162-94.72-default or later
SUSE Linux Enterprise Server 15: 4.12.14-23-default or later
本次安装环境为: Red Hat Enterprise Linux 7.5
硬件环境需求
|
服务器制作与体系结构 |
确认支持服务器制造、模型、核心体系结构和主机总线适配器 (HBA) 或网络接口控制器 (NIC) ,以便与 Oracle 数据库和 Oracle 网格基础设施一起运行。 |
|
服务器显示卡 |
至少 1024x768 显示分辨率,这是 Oracle 通用安装程序需要的。 |
|
最小 RAM |
|
|
分配给 /tmp 目录 |
中至少有 1GB 的空间。 /tmp 目录。 |
|
相对于 RAM(Oracle 数据库 ) 的交换空间分配 |
在 1 GB 和 2 GB 之间: RAM 大小的 1.5 倍 介于 2 GB 和 16 GB 之间:等于 RAM 的大小 超过 16 GB : 16 GB 注意:如果您为 Linux 服务器启用了 HugePages ,那么您应该在计算交换空间之前从可用 RAM 中扣除分配给 HugePages 的内存。 |
|
Oracle 软件的最小本地磁盘存储空间 |
对于 Linux x86-64 : 至少 6.0 GB 用于独立服务器安装的 Oracle 网格基础设施。 Oracle Database Enterprise Edition 至少为 7.8 GB 。 Oracle 数据库标准版 2 至少为 7.8 GB 。注: 注意: Oracle 建议您分配大约 100 GB ,以便在现有 Oracle 主目录之上留出额外的空间来应用任何未来的修补程序。有关与修补程序相关的特定磁盘空间要求,请参阅修补程序文档。 |
介质需求
Oracle:21.3.0.0.0
LINUX.X64_213000_db_home.zip
操作系统基础配置
检查服务器硬件和内存配置
使用以下命令确定服务器上的物理RAM 大小至少1G 以上
# grep MemTotal /proc/meminfo
确定配置的交换空间的大小
# grep SwapTotal /proc/meminfo
确定tmp 目录空间足够1G
# df -h /tmp
(如果 /tmp 空间不足,则清理 /tmp 目录以满足磁盘空间要求。
或设置 Oracle 用户环境时,还要设置 TMP 和 TMPDIR 环境变量到要使用的目录中,而不是 /tmp )
确定系统版本能够支持19c 数据库
# uname -m
关闭防火墙
关闭运行中的服务
#systemctl stop firewalld.service
关闭操作系统自启动
#systemctl disable firewalld.service
检查关闭情况
systemctl status firewalld.service
如下,dead 表示未开启开机启动;inactive 表示现在的状态是关闭

关闭selinux :
编辑/etc/selinux/config 文件
[root@DBServer1 ~]# vi /etc/selinux/config
# This file controls the state of SELinux on the system.
# SELINUX= can take one of these three values:
#       enforcing - SELinux security policy is enforced.
#       permissive - SELinux prints warnings instead of enforcing.
#       disabled - SELinux is fully disabled.
SELINUX=disabled
# SELINUXTYPE= type of policy in use. Possible values are:
#       targeted - Only targeted network daemons are protected.
#       strict - Full SELinux protection.
SELINUXTYPE=targeted
关闭NUMA :
在Linux Redhat7 的环境中建议关闭NUMA
# 查看default 的grub 的entry
[root@dusadbs01 ~]# grubby --default-kernel
/boot/vmlinuz-3.10.0-862.el7.x86_64
# 查看default grub 的具体信息
[root@dusadbs01 ~]# grubby --info /boot/vmlinuz-3.10.0-862.el7.x86_64
index=0
kernel=/boot/vmlinuz-3.10.0-862.el7.x86_64
args="ro rd.lvm.lv=centos/root rd.lvm.lv=centos/swap rhgb quiet.UTF-8 "
root=/dev/mapper/centos-root
initrd=/boot/initramfs-3.10.0-862.el7.x86_64.img
title=CentOS Linux (3.10.0-862.el7.x86_64) 7 (Core)
# 更新args , 添加numa=off 的参数
[root@dusadbs01 ~]# grubby --args=numa=off --update-kernel /boot/vmlinuz-3.10.0-862.el7.x86_64
# 确认numa=off 加入default grub 中
[root@dusadbs01 ~]# grubby --info /boot/vmlinuz-3.10.0-862.el7.x86_64
index=0
kernel=/boot/vmlinuz-3.10.0-862.el7.x86_64
args="ro rd.lvm.lv=centos/root rd.lvm.lv=centos/swap rhgb quiet.UTF-8 numa=off"
root=/dev/mapper/centos-root
initrd=/boot/initramfs-3.10.0-862.el7.x86_64.img
title=CentOS Linux (3.10.0-862.el7.x86_64) 7 (Core)
# 重启服务器
reboot
[root@utsdbs02 etc]# grubby --info /boot/vmlinuz-3.10.0-862.el7.x86_64
index=0
kernel=/boot/vmlinuz-3.10.0-862.el7.x86_64
args="ro rd.lvm.lv=centos/root rd.lvm.lv=centos/swap rhgb quiet.UTF-8 numa=off"
root=/dev/mapper/centos-root
initrd=/boot/initramfs-3.10.0-862.el7.x86_64.img
title=CentOS Linux (3.10.0-862.el7.x86_64) 7 (Core)
[root@utsdbs02 etc]# grep -i numa /var/log/dmesg
[    0.000000] Command line: BOOT_IMAGE=/vmlinuz-3.10.0-862.el7.x86_64 root=/dev/mapper/centos-root ro rd.lvm.lv=centos/root rd.lvm.lv=centos/swap rhgb quiet.UTF-8 numa=off
[    0.000000] NUMA turned off
[    0.000000] Kernel command line: BOOT_IMAGE=/vmlinuz-3.10.0-862.el7.x86_64 root=/dev/mapper/centos-root ro rd.lvm.lv=centos/root rd.lvm.lv=centos/swap rhgb quiet.UTF-8 numa=off
确认numa 已经被禁用了
包安装
oracle 21C 需要以下RPM 依赖包:
bc
binutils
compat-libcap1
compat-libstdc++33
elfutils-libelf
elfutils-libelf-devel
fontconfig-devel
glibc
glibc-devel
ksh
libaio
libaio-devel
libX11
libXau
libXi
libXtst
libXrender
libXrender-devel
libgcc
libstdc++
libstdc++-devel
libxcb
make
smartmontools
sysstat
compat-libstdc++-33-3.2.3 需要手动下载上传
挂载光驱
mount /dev/cdrom /mnt
配置yum :
vi /etc/yum.repos.d/dvd.repo 添加如下:
[dvd]
name=dvd
baseurl=file:///mnt
gpgcheck=0
yum install bc binutils compat-libcap1 compat-libstdc++33 elfutils-libelf elfutils-libelf-devel fontconfig-devel glibc glibc-devel ksh libaio libaio-devel libX11 libXau libXi libXtst libXrender libXrender-devel libgcc libstdc++ libstdc++-devel libxcb make smartmontools sysstat kmod*
安装用户创建
创建oracle 用户
groupadd oinstall
groupadd dba
useradd -g oinstall -G dba oracle
passwd oracle ---- 修改oracle 用户密码
内核参数设置
vi /etc/sysctl.conf
kernel.shmall = physical RAM size / pagesize For most systems, this will be the value 2097152
kernel.shmmax = 1/2 of physical RAM
fs.aio-max-nr = 1048576
fs.file-max = 6815744
kernel.shmmni = 4096
kernel.sem = 250 32000 100 128
net.ipv4.ip_local_port_range = 9000 65500
net.core.rmem_default = 262144
net.core.rmem_max = 4194304
net.core.wmem_default = 262144
net.core.wmem_max = 1048576
执行sysctl -p 命令使以上设置生效
编辑/etc/pam.d/login 添加如下内容:
vi /etc/pam.d/login
session required pam_limits.so
编辑vi /etc/profile 添加如下内容: # 系统环境变量
if [ /$USER = "oracle" ] ; then
    if [ /$SHELL = "/bin/ksh" ]; then
        ulimit -p 16384
        ulimit -n 65536
    else
        ulimit -u 16384 -n 65536
    fi
    umask 022
fi
编辑/etc/security/limits.conf 添加如下内容:
vi /etc/security/limits.conf
oracle soft nproc 2047
oracle hard nproc 16384
oracle soft nofile 1024
oracle hard nofile 65536
环境变量设置
Oracle 用户
vi ~/.bash_profile # 当前用户环境变量
export ORACLE_BASE=/oracle/app
export ORACLE_HOME=/oracle/app/product/21.3.0/db_1
export ORACLE_SID=orcl
export PATH=$ORACLE_HOME/bin:$PATH
创建软件目录:
mkdir -p /oracle/app/product/21.3.0/db_1
chown -R oracle:oinstall /oracle
写入
root 用户
vi /etc/hosts
192.186.30.90 (ip ) 21c (主机名)
介质安装前准备
上传介质
LINUX.X64_213000_db_home.zip
需要注意的是, 21c 需要把软件包直接解压到 ORACLE_HOME 的目录下
Oracle 用户
unzip LINUX.X64_213000_db_home.zip -d $ORACLE_HOME
安装数据库软件
开始安装RDBMS 软件
-----------------------------------------------------------------------------------------------
oracle 用户执行安装:
打开Xmanager-passive
export DISPLAY=xxx.xxx.xxx.xxx:0.0(xxx.xxx.xxx.xxx 为操作机器的IP 0.0 为xxmanager 的端口)
cd $ORACLE_HOME
./runInstaller
安装截图如下:
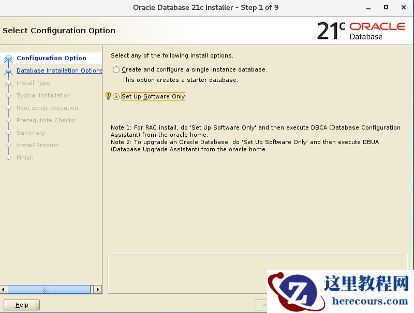
这里只选择安装软件,实例在软件安装好后再安装
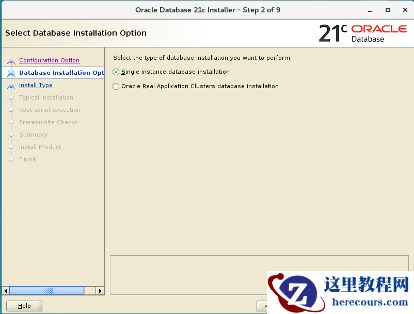
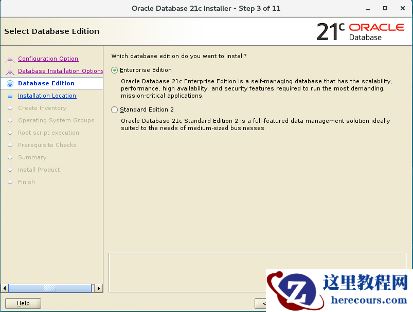
选择
企业版
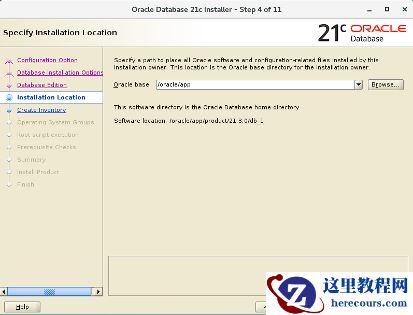
这里填写在环境变量里配置过的
ORACLE_BASE
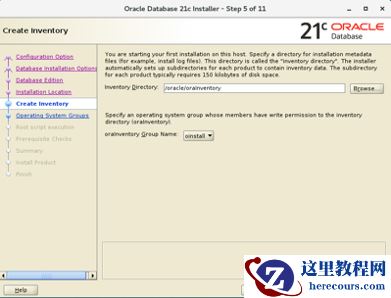
Next
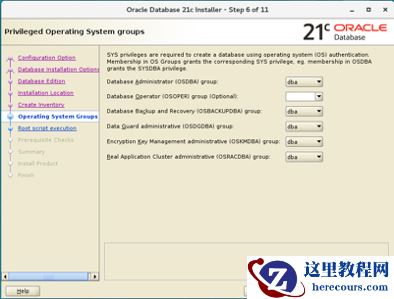
输入密码,
root
自动执行脚本,当然也可以选择手动执行
root
脚本
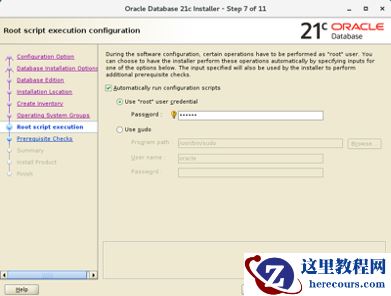
下一步:预检查 fix&Check Again
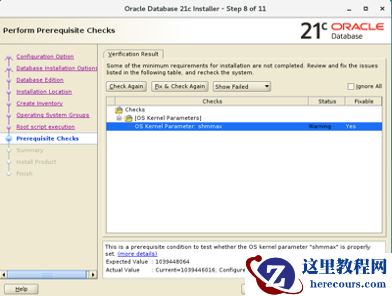
点击ok
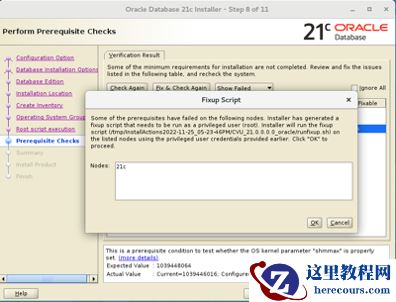
Install
开始安装
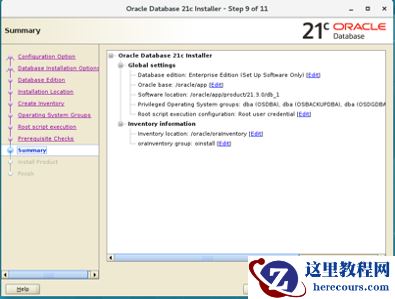
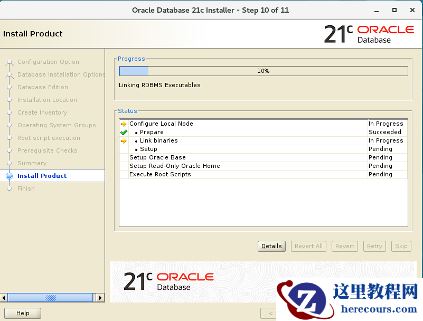
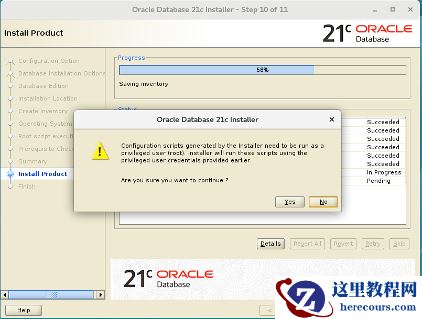
安装成功
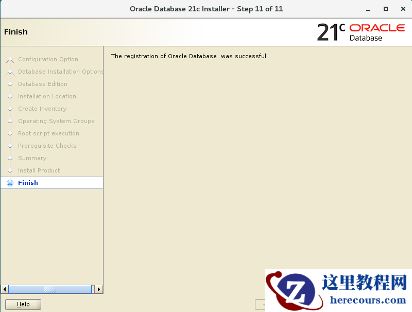
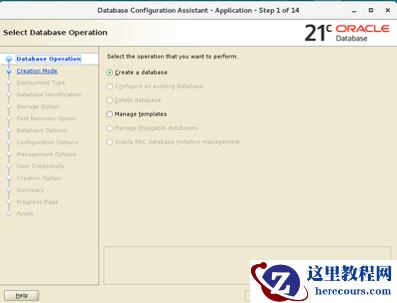
建库
选择create a database
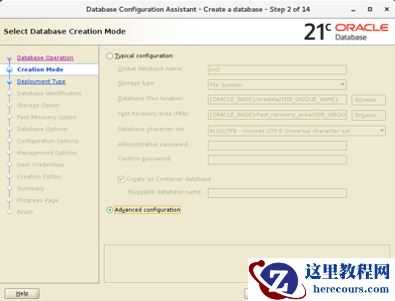
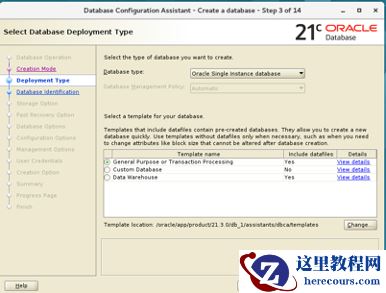
选择数据库模版
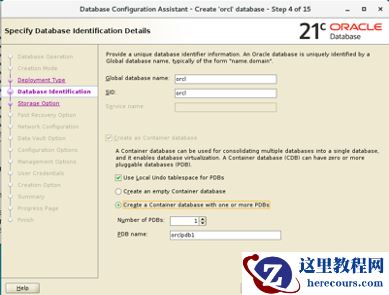
确定数据库实例名以及是否创建容器数据库
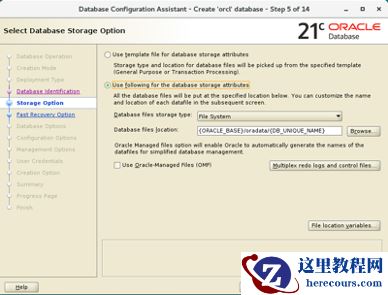
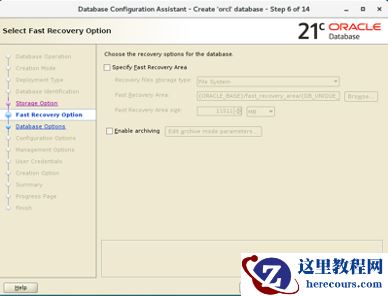
选择不开启闪回区域
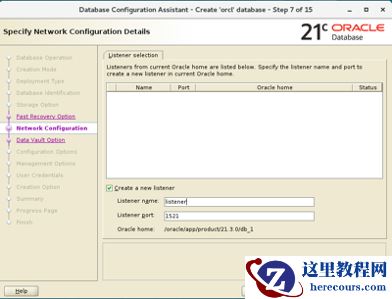
创建监听:
Next
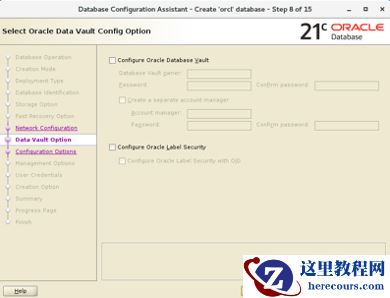
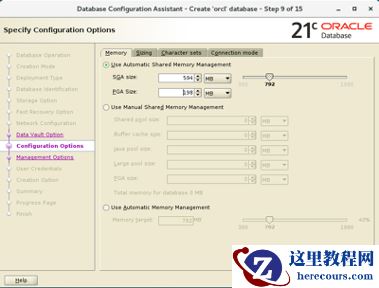
配置数据库内存
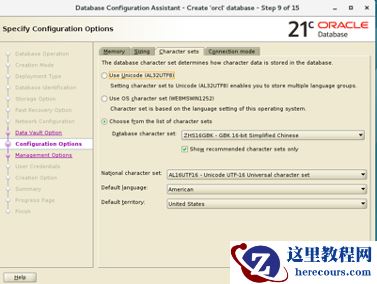
选择字符集
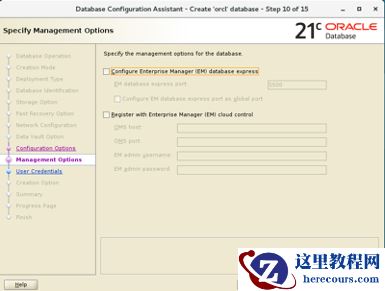
选择不配置EM
设置密码
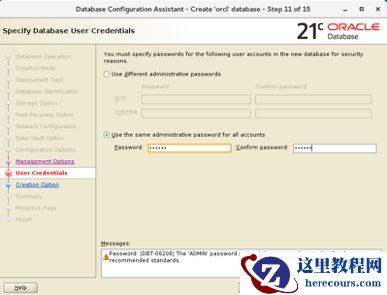
Next
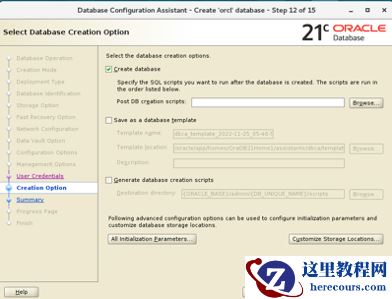
Next
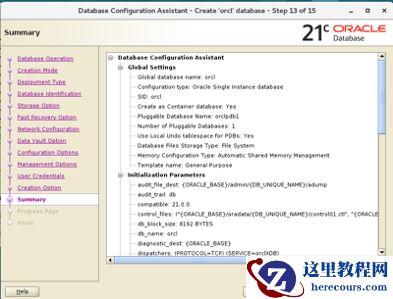
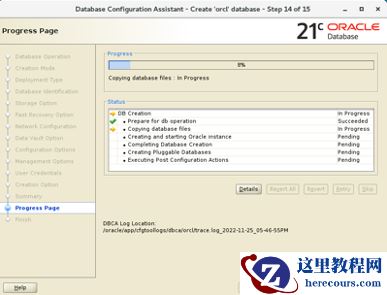
进度条读完,安装成功!